20170110 Honolulu – Good Eats!

With our friends headed to Oahu this month I thought I’d compile some of our favorite places to eat and visit on the island for them and for you who might stumble upon this site looking for some Hawaiian style adventure! So here’s part one covering the most important part of any great vacation… the food!

Poke
Ono Seafood – 747 Kapahulu Avenue, Honolulu

Ono Seafood

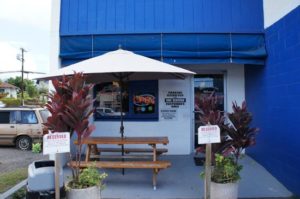
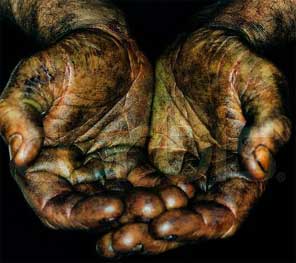
Poke is available at a lot of places in Honolulu and I advise trying them all, but that’s just me as I love poke when I’m on the islands. Poke here in Los Angeles can run the gamut of chewy and tasteless to the highest compliment, “almost Hawaiian”. In fact, so far we really can only recommend Pokinometry located in Anaheim, although our friends have recommended a place in Chino Hills that we’ll have to try out. Anyway… there are a lot of places that sell poke, and there are many places that have been touted as the best. But really the best in our book is Ono Seafood. The real difference here is the fresh fish and the fresh preparation. Most places have their poke made in advance and so if you don’t get it immediately after it’s made the marinade tends to toughen up the raw fish. Eventually, the moisture in the fish is drawn out by the salt in the sauce and dilutes the flavor. Ono Seafood is a hole-in-the-wall store located immediately next to a non-descript apartment building on Kapahulu Avenue. Easily confused with Ono Hawaiian Food which is just a block away towards Waikiki on the same street. Upon entering you’ll notice that the place is very small, in fact, it’s downright tiny! To your left is a refrigerator variably stocked with dried and smoked seafood pupus but ignore that for now. First check out the menu and select your fish and then choose one or all of the following to mix in: white or green onion, hawaiian salt, chili pepper, kukui nut, sesame oil, ogo or shoyu. The last time we were there I went simple with the Ahi, green onion, sesame oil and shoyu while Irene went with the Tako, hawaiian salt, chili and kukui nut. You really can’t go wrong, try a few different combinations! Forget trying to eat it there, take it to go but remember that this stuff definitely has a limited shelf life so enjoy quickly!

Malasadas
Leonard’s – 933 Kapahulu Avenue, Honolulu

Leonard’s Bakery

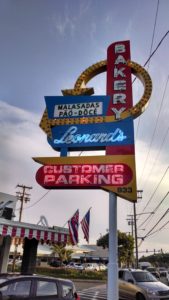
Although Malasadas arrived with Portuguese immigrants in the late 19th century, the doughy treats didn’t gain popularity until 1946, when Leonard Rego began selling his Portuguese Doughnuts in Honolulu. Deep fried and rolled in sugar and either left plain or filled with your choice of cream, haupia (coconut), guava or dobash (chocolate). They are slightly crispy on the outside and soft and fluffy on the inside and when you can get them warm, they are heavenly…


Breakfast
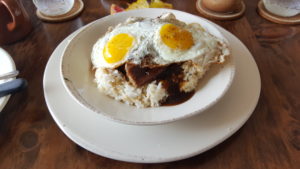
Goofy Cafe and Dine – 1831 Ala Moana Boulevard, Suite 201, Honolulu

Goofy Cafe and Dine

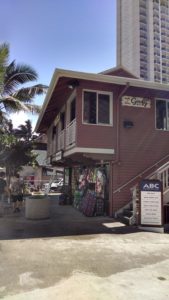
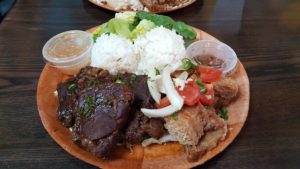
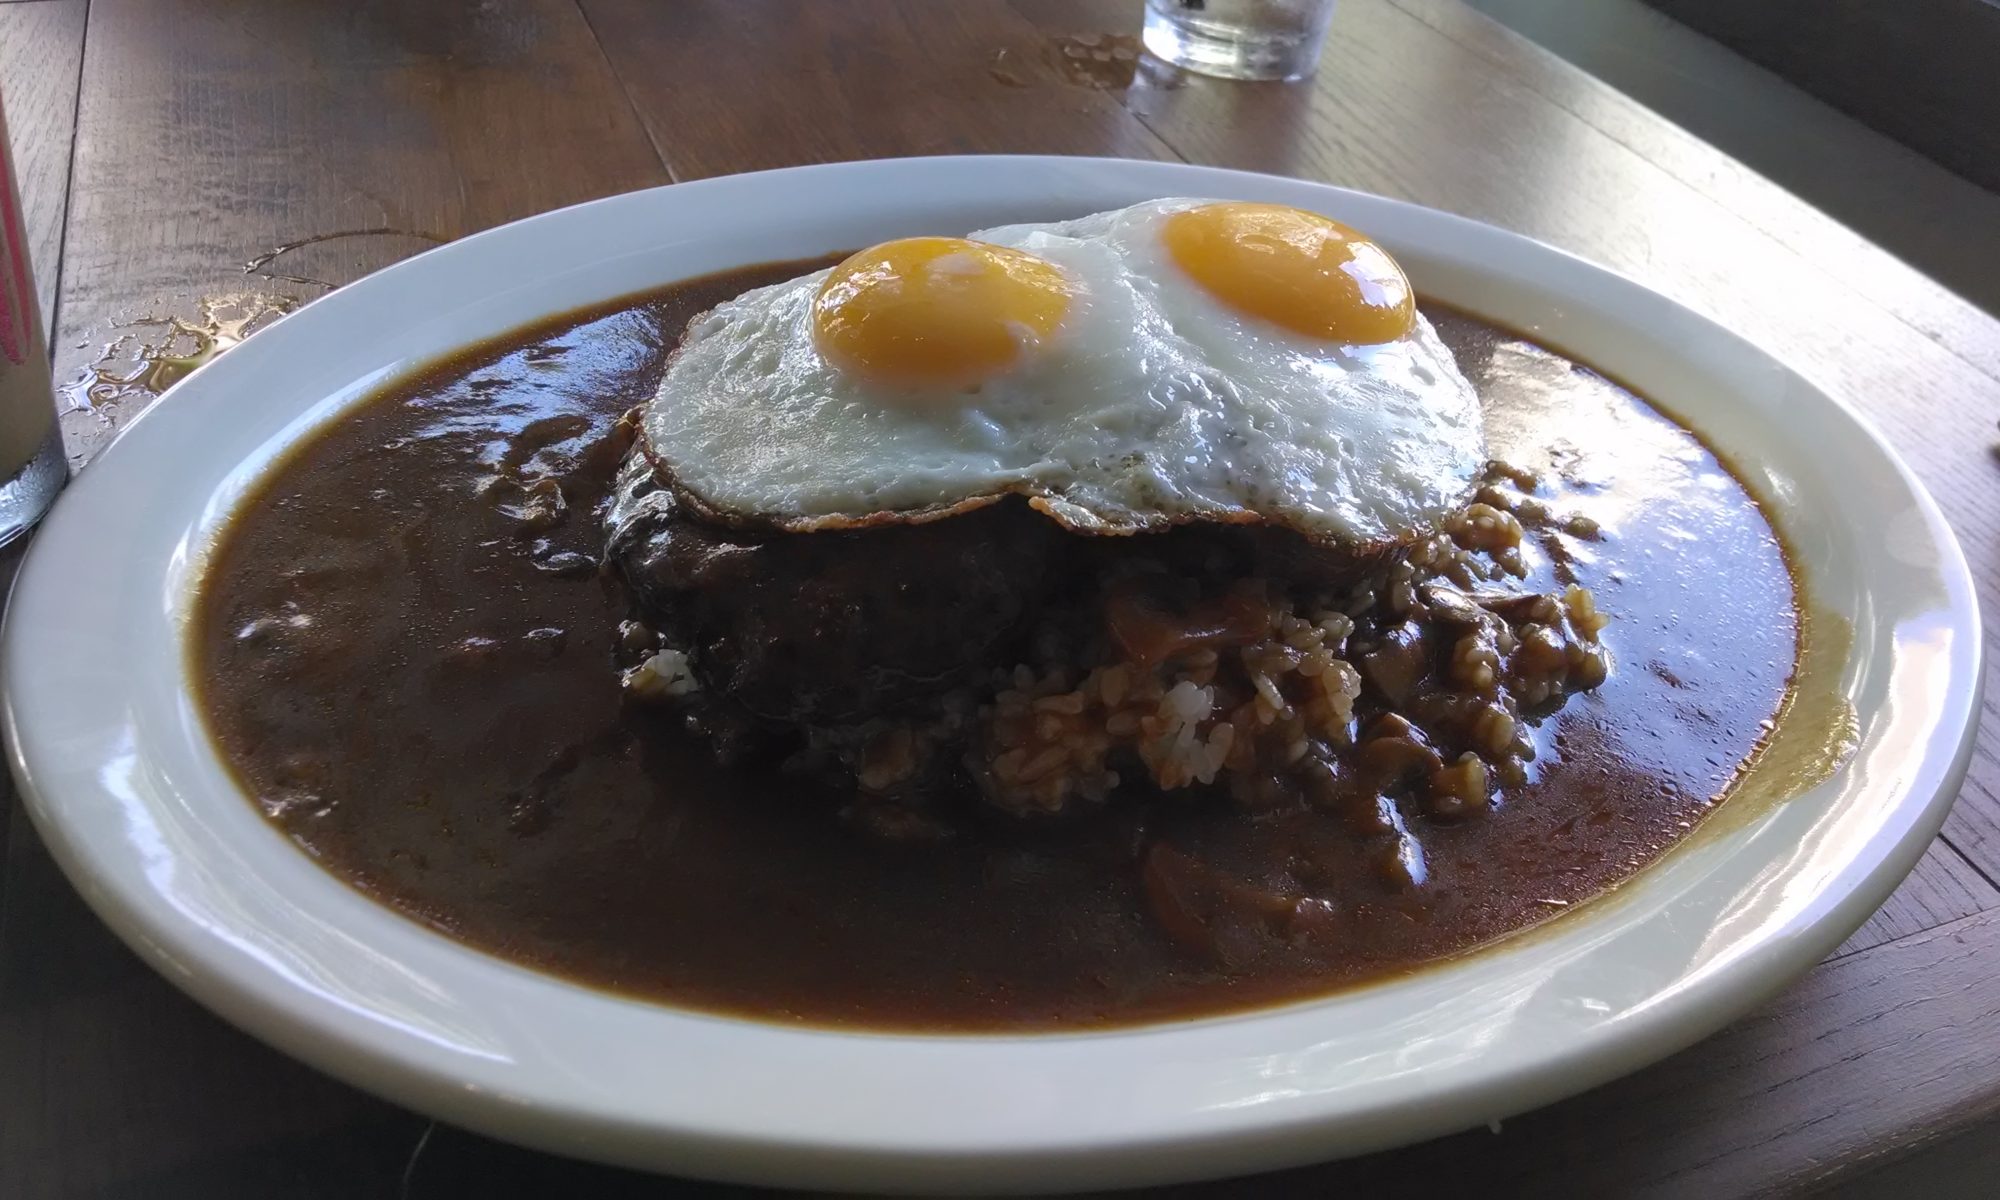
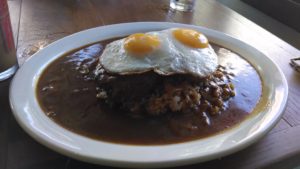
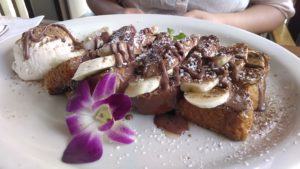
The wooden paneled walls, ceiling fans and racked surfboards make you feel like you’re hanging out at a beach house so you really start to get the feel for the islands here. They offer both healthy and hearty breakfast options and feature locally grown and sourced menu items. I loved their loco moco which is a local dish of a ground beef patty on top of rice topped with gravy and a fried egg. The French toast here was definitely Instagram worthy! Parking is tough here just like anywhere else in Waikiki so be prepared to walk a little.


Loco Moco
Hazelnut and chocolate banana french toast


Eggs N’ Things – 2464 Kalakaua Avenue, Honolulu

Macadamia nut pancakes
Acai Bowl

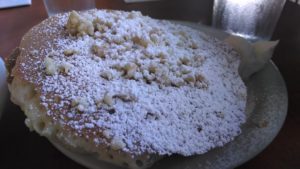
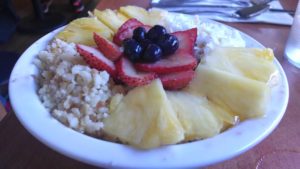
The pancakes here are not to be missed and when you are on the islands you really only have the one choice, macadamia nut everything! The other item we tried was the acai bowl, very popular here on the islands. Its basically a super tick acai berry smoothie topped with a generous amount of fruit and granola and are very refreshing! This location has an upper seating area that provided an excellent morning view above the street if you are lucky enough to grab a window table. This place is busy so be prepared for a wait even at off times.


Fast Food
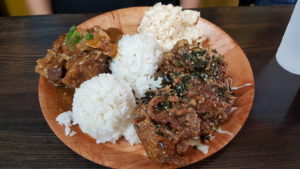
Zippy’s – 22 locations on Oahu
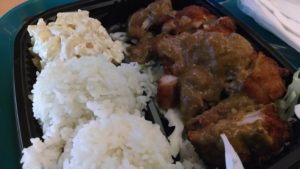
Offering local comfort foods like the loco moco and teriyaki cheeseburgers, alongside staples like their famous chili, as well as a Zip Pac bento, filled with your choice of teriyaki beef, Spam, fried chicken, or mahi mahi on rice, sprinkled with furikake and a slice of daikon. These stores are found throughout Oahu and are a much better choice than your typical fast food. While the smaller mom and pop lunch places can have better food, Zippy’s offers convenience and consistency and some nice local plates.

Katsu Curry Plate

Musubi
Musubi Cafe Iyasume – 5 locations on Oahu
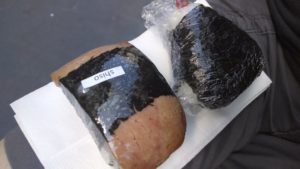
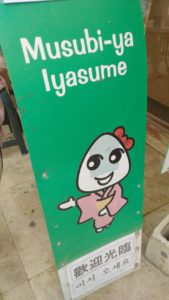
Spam Musubi can be found at almost every Hawaiian plate lunch restaurant on the islands. Consisting of pan fried slice of spam on top of rice with a wrap of roasted seaweed. These little handheld snacks are perfect for a quick bite on the go! Musubi Cafe features more than 35 types of musubis including 10 different kinds of spam musubi! They have more on their menu than just musubi, including bentos, beef, curry and salmon bowls, miso soup and more. Don’t wait for one of their few tables, take your order to go and eat at the beach!


Shiso and Spam Musubi and Sour Plum Onigiri

Noodles
Marukame Udon – 2310 Kuhio Ave #124, Honolulu
There is almost always a line out the door but this casual self-service style restaurant is well worth the wait. These aren’t your typical udon noodles either, prepared in the Sanuki-style known for its backbreaking process that results in a delicious noodle with a great tooth. As you wait, watch the cooks prepare the fresh dough into thick noodles. Pick from an assortment of unique dishes, including curry, niku, kamaage, or zaru udon.  Once you’ve ordered your udon pick from an array of tempura and find a spot to quickly slurp down your noodles!


So this is just a start of the many awesome eats you can experience in Oahu, I’ll be posting the next part that covers some activities and sights soon!

Follow us on instagram @adventurenotincluded or for more photos, check out our Flickr album here.

20161118 Tread Lightly Principles – Part Two

Carrizo Plain NM
Carrizo Plain NM

There is nothing quite like waking up with the sun gently filtering into your tent, the cool morning air urging you to get up. There is nothing better than that first cup of coffee while out in the back country and I strongly feel that the smell of bacon cooking in the great outdoors is one of life’s greatest pleasures. For many families, camping has become somewhat of a budget friendly tradition. Camping is perhaps the original ecotourism, a couple of days camping and you can gain a greater appreciation for nature, gain personal enrichment and environmental awareness. Combine that with the potential for exercise and education and you have all the ingredients for a great family vacation.

But the choices you make can have an effect on the environment and can actually inflict harm onto the area in which you camp. Here is where the Tread Lightly principles come into play. Here are ten ways you can minimize negative impacts when camping…


1.  Whenever possible, use existing campsites and camp on durable surfaces and place tents on a non-vegetated area. Creating new sites can permanently scar the landscape and removing plants promotes erosion that can further damage the area.

dsc_4960
Mahogany Flats Campground – Death Valley NP

2.  Camp a least 200 feet from water so that you don’t disturb wildlife that may rely on that water and when camping in the backcountry disperse your campsite at least 200 feet from trails and other campsites to minimize impact.

mojave-wander-031
Bachelor Wash – Mojave NP

3.  Pack out what you pack in and carry a trash bag to pick up litter left by others. If possible, take the garbage and recyclables home for disposal. Do not leave garbage at your campsite as this attracts animals and conditions them to think of humans as sources of food.

4img_2132
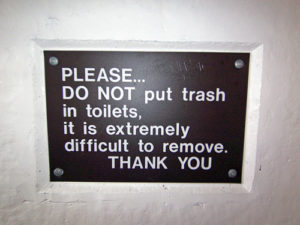
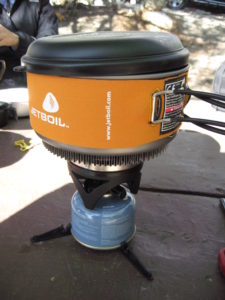
Consider food options with minimal packaging or repack your foods in resealable, reusable containers to reduce the amount of trash you generate.

5.  For cooking, consider using a camp stove instead of a campfire. Camp stoves create less of an impact on the land and are much more efficient.

6.  img_1693Observe all fire restrictions and observe all rules regarding fires according to the area that you are camping in. If you build a fire, use existing fire rings or use a fire pan. If allowed, use only fallen timber for campfires, do not cut standing trees or limbs. Keep a 10-foot diameter area around the campfire clear of any flammable materials and make sure there aren’t any tree limbs or flammable objects hanging overhead.

7.  Allow the wood to burn down to a fine ash, if possible. Pour water on the fire and drown all embers until the hissing sound stops. Stir the campfire ashes and embers until everything is wet and cold to the touch. If you don’t have water, use dirt.

8.  Detergents, toothpaste and soap can harm fish and other aquatic life. Try to use a biodegradable, plant-based soap so it won’t harm the surrounding environment. Keep grey water 200 feet away from water sources and scatter your gray water so it filters through the soil and to avoid attracting animals directly to your site.photogrid_1477030084257

9.  images
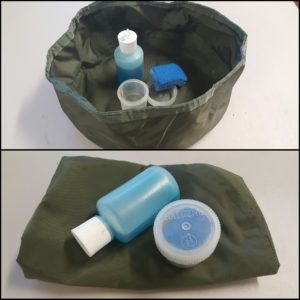
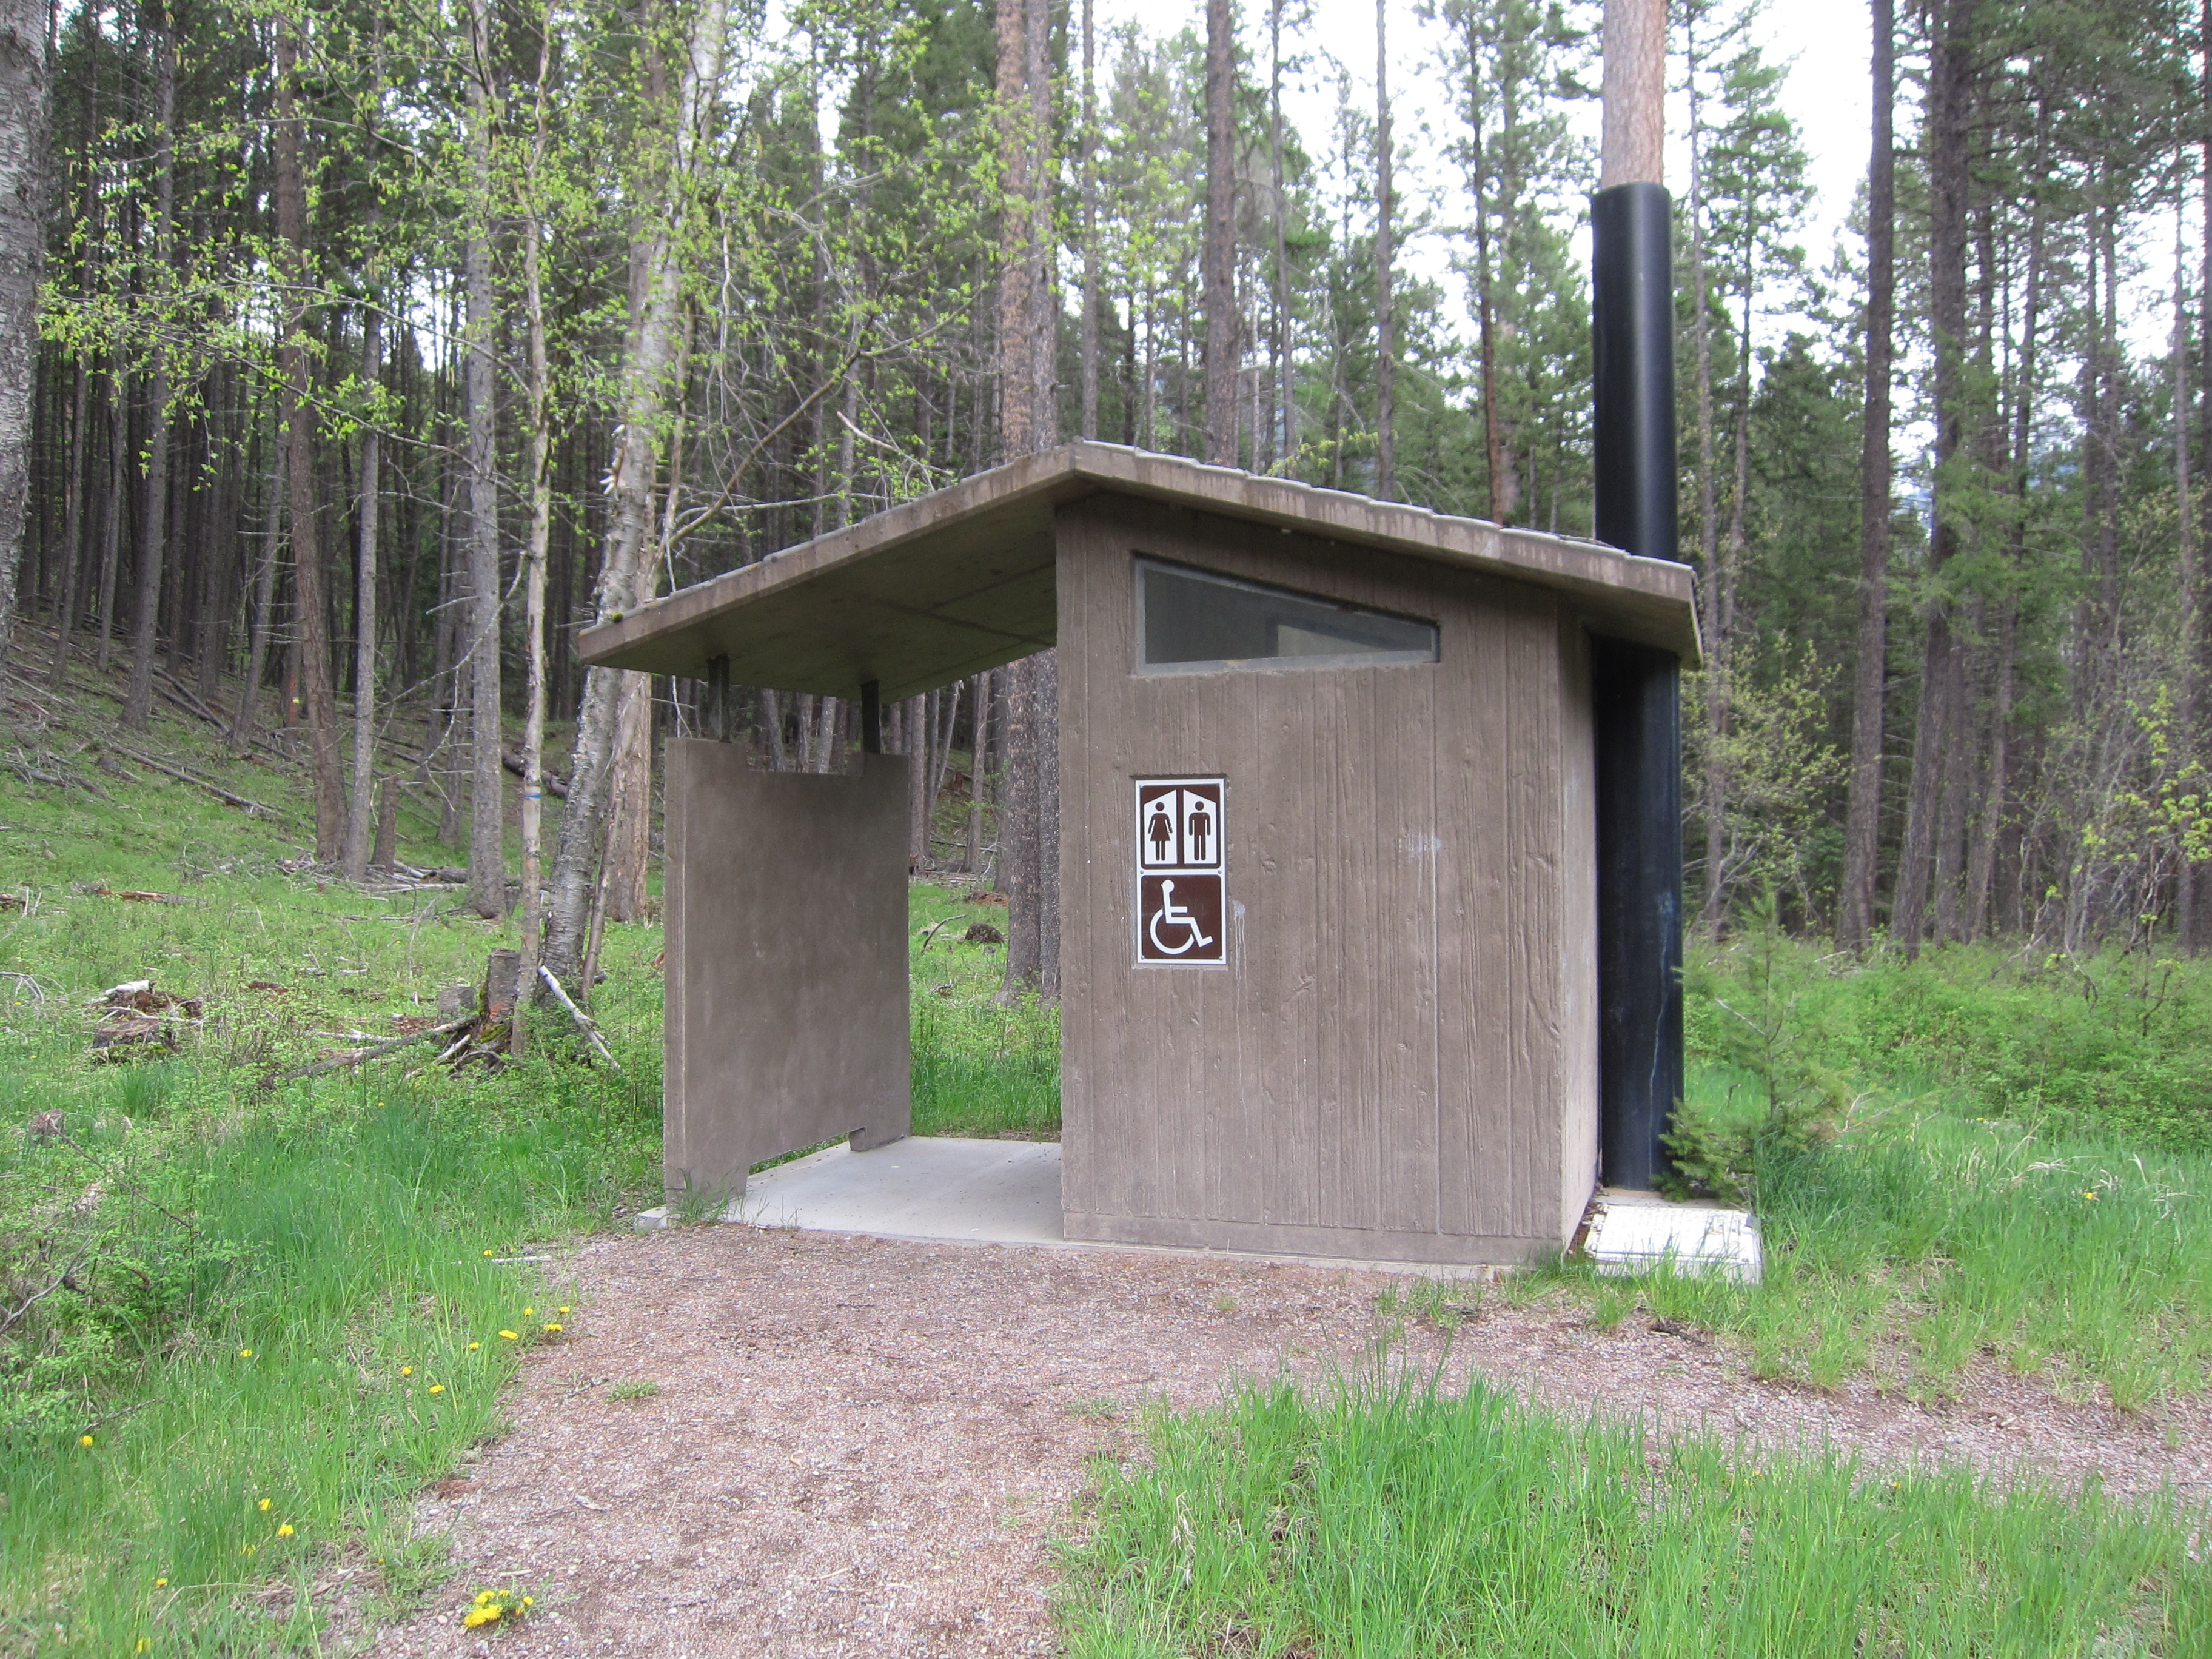
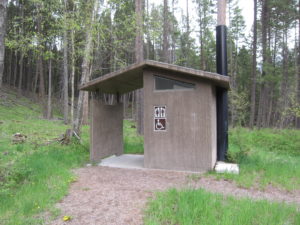
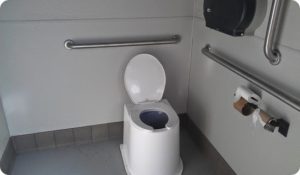
In areas without toilets, use a portable latrine if possible and pack out your waste. If you don’t have a portable latrine, you may need to bury your waste. Human waste should be disposed of in a shallow hole six to eight inches deep at least 200 feet from water sources, campsites or trails. Cover and disguise the hole with natural materials. It is recommended to pack out your toilet paper. High use areas may have other restrictions, so be aware of local regulations.

10.  Following a trip, wash your gear and vehicle to reduce the spread of invasive species.


There you have it, ten tips so you can go camping and reduce your impact on the environment! If we all do our part to Tread Lightly, we can all enjoy our wonderful outdoors together. Thanks for reading and remember to find your adventure where ever you may wander!

Follow us on instagram @adventurenotincluded or for photos of our adventures, check out our Flickr account here.

20161112 – Tread Lightly Principles – Part One

As promised, here is the first of a two part series discussing the Tread Lightly principles… to be honest when we first starting heading out to explore the great outdoors I had never heard of the Tread Lightly principles and when I finally did hear about them I didn’t pay much attention. For the most part we tried to be conscientious when we were outdoors but some of the things we learned just from being out there. Now as more and more people are heading outside for the first time to enjoy their National Parks and backcountry there is a greater need than ever for all of us to be aware of and follow these simple guidelines so that all of us can enjoy the natural beauty and majesty of the outdoors. The Tread Lightly principles help us to minimize our impact to the environment and teach responsible outdoor etiquette. For more information please go to www.treadlightly.org to learn more tips or how you can be more involved in stewardship projects.tl-logo

Travel Responsibly by staying on designated roads and trails. If possible, go over obstacles instead of going around and widening the trail. Cross streams only at designated areas and minimize splashing and stirring up sediments. When possible, avoid wet or muddy trails to reduce erosion and rutting. When on water, stay on designated waterways and launch your watercraft in designated areas.

utahbigfive0079b
Turn off on the Burr Trail in Canyonlands NP

Respect the Rights of Others including private property owners, recreational trail users, campers and others so they can enjoy their recreational activities undisturbed. While on designated trails or roads, leave gates open or closed as you found them. Yield right of way to those passing you or going uphill and understand trail sharing etiquette. When on water, respect anglers, swimmers, skiers, boaters, divers and those on or near the shore.

share-our-trails-graphic
Trail Sharing

Educate Yourself prior to your trip by obtaining maps of the area and get to know the restrictions and regulations from public agencies for where you are going. Plan for your trip by taking recreational skills classes, checking the weather forecast and familiarize yourself with your equipment and how to operate it safely.

taft-point-sentinel-dome
topo maps are very useful

Avoid Sensitive Areas such as meadows, lake shores, wetlands and streams. Stay on designated routes to protect yourself and wildlife habitats and sensitive soils from damage. Do not disturb historical or archeological sites. When on water, avoid operating your watercraft in shallow water or near shorelines at high speeds.

dsc_0155-black-tank-wash
Petroglyphs in Mojave NP

Do Your Part by modeling responsible behavior by leaving the area better than you found it. You can do this by properly disposing of waste and trash, minimize the use of open fires, avoid the spread of invasive plants and animals and avoiding damage to sensitive areas.mojave-wander-044

The next part of this series will cover some specifics for applying Tread Lightly principles while camping. Thanks for reading and remember to find your adventure where ever you may wander!

Follow us on instagram @adventurenotincluded or for photos of our adventures, check out our Flickr account here.

20161107 – How to Properly Use a Pit Toilet

With an upcoming car camping trip planned for this month and with some of you never having camped before, I thought I’d go over a subject that few others would probably talk to you about. It’s not that it isn’t important, it is very important but some of these things come automatically and some are learned over the years. The first thing to remember is that a pit toilet is your friend. You may not think of it but without that pit toilet you may well be faced with some of life’s crueler options to relieve oneself… the port-a-potty for one… and the field toilet, bag in a bucket as another. For me personally, digging a hole in the ground is much preferable to either one but after being in rural China and seeing the concrete ditch with no walls option, I am happy with a pit toilet. That being said, it is a gamble every time you approach one of these concrete bunkers… Is this a pristine, rarely used but regularly maintained toilet? Or is this a heavily trafficked and disgusting pit of human suffering? You can never tell… pittoilet

So here are eight things to remember when visiting your friendly neighborhood pit toilet:

  1.  Look down but don’t linger… it’s good to take a quick look down to make sure it’s not flooded or overflowing. Getting splashed by that brine of human waste would certainly ruin your day but no need to stare, you won’t find anything of value down there, trust me…

    0
    Are you going to go down and get it?
  2. Lock the door. This may seem like a slam dunk but with all the nervousness of trying to remember the 8 items on this list you might forget and if you do you’ll certainly ruin someone else’s day as well.keep-calm-and-lock-the-door-2
  3. Check for toilet paper. Or even better, bring your own! I always carry toilet paper in the car for just that reason, just as an example, on our last group camping trip we managed to go through all five rolls that were in the toilet at the beginning of our trip. If you didn’t bring any, even though I strongly suggested it, you may have had to go begging among your fellow campers.imag2995_thumb3
  4. Secure your belongings… Don’t sit down yet! Make sure that all hats, glasses, cameras, cellphone, etc are secure and won’t tumble into the ever after, and if it does, well that leads us to the next item…

    safety2
    This here’s the wildest ride in the wilderness!
  5. Don’t throw trash down there. Most likely there will be a sign stating just that, don’t be an idiot, don’t do it. Everything that goes down there must be brought back out via a huge vacuum and trash can stop up the process. Imagine the work needed to UNSTOP that trash that’s now stuck in the vacuum. I’d rather not think about that… blogpittoiletsign
  6. Breathe through your mouth and take shallow breaths. I shouldn’t have to explain that you are sitting on a mountain of human waste and taking deep breaths through your nose would be an exceedingly bad idea. This is not the time to compose an Instagram post, be efficient and get out of there, especially when you have others waiting to use the same toilet!texting_on_the_toilet_bathroom_without_my_phone_was_weird
  7. Put down the cover. Again, this might seems small but I’m disgusted every time I enter a pit toilet and the lid is wide open. Keeping the lid closed keeps the odor of a thousand bowel movements somewhat contained and it also keeps the number of flies down. Yes, that same fly that just landed on your sandwich… Gross? Yup! so CLOSE THE LID!2fe3053900000578-3388799-image-a-10_1452179741419
  8. Bring hand sanitizer. If you are using a pit toilet you are most likely in an area that does not have running water so hand sanitizer is an essential item. Occasionally there is a dispenser of sanitizer there by the door but about half the time I find these are empty so it’s better to bring your own.dirty_hands

There you have it, that wasn’t so bad was it? Now you are fully prepared to take on the pit toilets of the world and be a little more appreciative of their existence. Thanks for reading and remember to find your adventure where ever you may wander!

Follow us on instagram @adventurenotincluded or for photos of our adventures, check out our Flickr account here.

20161026 – Fungwaii Part One

The Fungs go to Hawai’i… Part ONE

20161026_150832My wife’s family have never really traveled much together and we decided about a year ago to try to have a family trip to Hawaii. So after much planning and waiting we were finally ready to go! Quick shuttle ride to LAX, breeze through security thanks to TSA PreCheck and we sat down for a nice lunch at Skewers, right next to our gate. Just a note about the TSA PreCheck, earlier this year we had decided to sign up for GlobalStar as we had a trip to Paris planned for May. Included in the GlobalStar program is enrollment into the TSA PreCheck program as well. The application requires a thorough background check, interview and a $100 fee. The ease of returning from France, going through immigration and customs was well worth the effort. The ability to use the TSA PreCheck lines through the airport security is a nice perk as well. Going and returning to LAX we only one person in front of us in line at the security checkpoint. I just wish that people would read the TSA PreCheck instructions and familiarize themselves with the process. Both times the people in front of us had no clue what to do, which is frustrating as the short wait would have been halved if they knew what they were doing… oh well, what can you do?

Getting through security so quickly gave us plenty of time to find our gate and settle in for a leisurely lunch. We found some seat with good view of the gate and waited for them to call our zone. I wish that all of the gates would designate areas for each zone rather than allow passengers to stand around the gates blocking the entrance. For our international flights, it was nice that they had organized queues for each zone. So, after an unexplained one hour delay with Delta having to switch planes at the last minute (slightly worrisome!), we finally arrived at Kailua Kona airport, tired but happy to finally be on the Big island again!20161027_002458

Day One -Kailua Kona

Our first day would be getting some supplies and checking into the house that we rented through Home Away but first we needed some food and coffee to get us started on the right track! We had read reviews that Daylight Mind Coffee Company had great views of Kailua Kona and so we headed down Ali’i Drive to check it out. We decided to share the braised short rib loco moco for breakfast and it really hit the spot, it was a great version of the local specialty. If you’ve never had a loco moco, you’ll have to try one the next time you come to the islands. Usually it is a hamburger patty served over rice and a fried egg, topped with brown gravy. We’ve had a few versions of the loco moco over the years and this one ranked among the best. the views here were also excellent and we would highly recommend this place if you are in Kailua Kona!

Short Rib Loco Moco
Short Rib Loco Moco
View from DLMCC
View from DLMCC


After breakfast we headed over to the Farmer’s Market across the street and picked up some fresh fruit and some vegetables for the house. The selection here is nice and there are lots of local vendors selling other trinkets, souvenirs and jewelry as well. Our friends were also staying in Kona nearby so we called them up and offered to drop off some fruit. We hung out at their nice beachfront house for awhile before deciding to grab some lunch at a local favorite, Broke Da Mouth Grindz. Broke Da Mouth is located in the northern industrial area of Kona, definitely away from where most of the tourists hang out. We had read some reviews of the place and so we had to come check it out. We ended up ordering two combination plates to share with us and my wife’s parents who arrived just in time for lunch. Broke Da Mouth is hawaiian slang meaning that the flavor or taste is so good that your mouth will be broken and they are accurate with that description. They specialize in Filipino cuisine like adobo and lechon kawali but also Hawaiian lunch plate items. Adobo is a slightly sweet and vinegary sour braised dish and they prepare it very well here. Lechon Kawali is also pork and it is roasted with the crispy rind left on the fatty meat, also very well made and goes great with the housemade sweet chili sauce that is bottled in tequila bottles on every table. The braised short rib was tender and flavorful but the real star of the show was the Garlic Furikake Chicken! Garlic chicken can be found at many Hawaiian food joints and furikake is the seasoned seaweed and sesame seed flavoring that’s found on top of almost everything here on the Big Island. But Broke Da Mouth is known for the Furikake Chicken and the reputation is well deserved! Crispy without greasiness, garlicky but not overpowering, slightly sweet capturing that ultimate in umami flavoring. We devoured it all and were left wanting more!

20161027_130129
Combo #1 with Furikake Chicken and Pork Adobo
20161027_130143
Combo #2 with Short Rib and Lechon Kawali

Overall, the food and service were great and it kept us coming back, in fact we visited three times over the week we were in Hawaii! The place is small and it is in a hard to find plaza just off Kaiwi and Luhia, just south of Queen Ka’ahumanu Highway. I think the only downside is the pricing, it is not cheap but we thought that the quality and flavor of the food was worth the price. Our family and friends tried quite a few things on the menu and enjoyed it all!

After the great lunch with friends it was time to hit up Costco and then on to check in at the house that we rented for the week. Located in Holualoa which is mauka (uphill) from Kona about 15 – 20 minutes, the home is located in the famous Kona Coffee belt, away from the tourists and crowds of Kona. Located on the mountainside it definitely felt like we were escaping. Situated on a few acres of a small ranch with goats, sheep and even a cow it was a great environment for relaxation and a different experience for the young kids in our group. With 11 adults and 3 children we needed a place with plenty of space and this place was the perfect fit, however we would probably not stay so far away next time as it was inconvenient if we needed to “run down the hill” for supplies or breakfast.

20161027_154235
Keopu Mauka Hale

That evening my wife and I went down into Kona for a late dinner at Huggo’s on the Rocks where we sat in chairs on the sand, next to the bay where we could see the fire dances of the luau’s across the water. Not to be confused with the nicer Huggo’s next door, this place was the perfect end to a long day, with a pina colada, live music and the lights reflecting off the water! This was just the start to our Hawaiian adventure we were calling Fungwaii2016! Thanks for reading and Part Two will be up soon!

Follow us on instagram @adventurenotincluded or for more photos, check out our Flickr album here.

20161023 – Car Camping Cooking Essentials, Part Two – Mess Kits, Utensils and Cleaning

coleman-mess-kit
Coleman 5 pc Mess Kit

Mess kits –  these can range widely from the super-duper, extra fancy and lightweight titanium nesting sets from a manufacturer like Snow Peak all the way to the super cheap plastic dinnerware sets. When we first started camping we bought most of our gear from Wal-mart, this was the most convenient and cheapest way to go and you can still find some really good deals there. The very first mess kit we bought was this 5 piece set from Coleman.  Super cheap and light I thought this was the perfect set but it unfortunately did not live up to our needs and we ended up using them as just plates and bowls and cooking in actual pots and pans we raided from the kitchen.

81wljcxgazl-_sl1500_
Coleman Max 4pc Set

This led to us purchasing some Coleman enamelware to use as plates and dishes and while we found that they were very durable, they were too heavy and bulky,meant more for a backyard BBQ or picnic rather than camping, especially if we were going to do some backpacking. This led us back to the store to check out other lightweight options and we found the Coleman Max anodized cook set. This set was similar to other much more expensive sets but at the Coleman price point it was perfect for us. Unfortunately for you they no longer carry this model and they did not make a replacement but there are several off-brand types available on Amazon like this very similar set here.

51ngx-tm0xl-_sl1024_
Nesting Cookware Set

For a single person or couple this is the perfect setup for heating and cooking individual meals. That is unless you are a real camp cook gourmet, then you’ll need to have your Lodge Cast Iron set! I’ve seen my niece cook some AMAZING things in her cast iron pots and pans and there is no better smell in the world than bacon cooking on a cast iron pan in the morning!

If you are looking for something a little nicer or you have a family this setup from Mountain Summit Gear is really nice and at a midrange budget the perfect set if you plan on doing a lot of camping. We still use the Coleman Max set as our personal cups and bowls but we have gotten very simple and eating dehydrated food that only requires boiling a cup of water and so we have reduced the need for cookware. If this is your first time camping you could always steal a pot from the kitchen and bring some plastic utensils and paper plates, it can be that simple! But, if you plan on camping with any regularity you should invest in a simple cookware and utensil set. This is better overall for the environment and gives you flexibility in your food prep as well.

41sbvum3igl
Cheap IKEA set


Utensils – If you are my wife this section is totally useless, no matter what nifty tool I get or light, flexible, foldable, indestructible utensil I find, my wife uses a pair of disposable chopsticks to cook, eat and prep food. She believes that all of her ancestors have cooked outdoors using nothing but chopsticks so that’s all she needs about 99% of the time. The other 1% she begrudgingly uses a couple of inexpensive .$99 store nylon tools that for the most part work okay and you won’t feel bad if they melt, break or walk away.

51v3ilfvpsl-_sl1024_
Metal tongs work the best!

One item that I have found is really useful is a cheap pair of metal tongs. Metal and not plastic or nylon as those tend to bend and flex too much. Again, you don’t need to spend much on them as they will break or get lost sooner or later. I have been thinking about replacing our current set of tools with these from JetBoil since they break down to fit into the pot and they are relatively inexpensive. On the other hand, my wife has a point about the chopsticks… once you are done with them you can just throw them into the fire!

06e8f59a-4c94-4865-a194-a414fab2551f
JetBoil Cooking Utensils
51bydqxqxnl-_sl1000_
ceramic paring knife with cover

The last two items really make campsite cooking easier as well. We’ve been using a small ceramic cooking knife with cover and flexible cutting boards and they work out great. From cutting up fruit and vegetables to slicing cheese or a nice steak, having a nice sharp blade is very useful and the cover keeps the blade clean and safely stored. The cutting boards are great for throwing down on a nasty old picnic table to keep your food prep area relatively sanitary. We’ve found these two items really useful in general.

Flexible cutting boards

Now that we have covered cooking utensils you’ll also want something to eat with. Again, according to my wife you would just eat with the chopsticks that you cooked with… and she does have a point. But once in awhile you’ll need something more than a pair of sticks. When we first started camping I bought a pair of military style fork, spoon and knife sets in the center picture. These worked great and we still have them in our kit but they are little big and bulky so when we went backpacking we upgraded to the nylon fork and spoon combo at the bottom. These combo utensils are light and nearly indestructible but they come up a little short when you are trying to dig out the last bites of that Mountain House bag! Later on we ended up getting a couple of titanium utensils when they were on sale. Super light and super strong but also not cheap. In the end, for car camping or new campers, grabbing a set of the military or nylon combos are great. If this is your first trip, go with a set of plastic and wash them after your meal!

photogrid_1477030574959
(top) titanium spork (middle) military mess kit (bottom) nylon combo

Cleaning – This of course is everyone’s favorite part of camping! This can really be a chore, especially at a campsite with no running water but we have found that cleaning up pots and dishes are a lot easier with this simple folding camp sink. Ours is an old military style collapsible wash basin and are harder to find. The newer styles are a little better at holding up after they are filled but ours is super light and small once folded up. Along with the wash basin is a simple squeeze bottle of dishwash soap and a Scotchbrite Blue sponge that I cut into quarters and stuff into a Nalgene container to keep it clean and from getting other stuff wet.

photogrid_1477030084257
Our dishwashing setup

Some like to use rubbermaid containers, plastic shoeboxes, all the way up to this contraption here. Whatever you use just remember to get rid of your dirty dishwater away from your campsite and disperse the water so the scent is not concentrated in one area and well away from any water sources. Soaps and detergents can be harmful to aquatic life and the scent can and will attract rodents and even larger animals like coyotes to your campsite so keeping clean and following “Tread Lightly” principles are important.

What? You don’t know what Tread Lightly means? Well, check out this site for more information and look for a future blog post on the subject.  Thanks for reading and remember to find your adventure where ever you may wander!

Follow us on instagram @adventurenotincluded or for more photos, check out our Flickr account here.


20161020 – Car Camping Cooking Essentials, Part One – Campstoves

71gu2srxzol-_sl1500_
Coleman propane camp stove

Campstoves  –  If you’re gonna cook while camping (yes that is a choice as there are some that adhere to a no-cook camping lifestyle) you’re gonna need something to cook with and the choices are plentiful. There are some who stick with the tailgater style propane grills, the old-school Coleman propane stove, butane canister stoves, isobutane stoves, integrated stoves and the liquid fuel bottle stove. Since we are talking about car camping here I’m gonna stick with the most popular ones. First up is the OG camping stove, the Coleman propane stove. We used one for years and then gave it away and got another one and gave that one away too, each time thinking that we have graduated from the classic propane stove. But it’s a classic for a reason, easy to use, inexpensive and  readily available fuel and great cold weather performance makes this a great stove for any car camper.

41cwpjlrggl
Portable butane stove

One option that we have seen and we have tried it ourselves is the butane stove. Most of our Asian friends out there will be familiar with this type of single burner butane stove (hot pot or Korean BBQ anyone??). It burns very efficiently and provides great heat, it’s light and inexpensive but the canisters are not as readily found and it suffers in altitude or colder climates.  This is our current option when we go group camping and need to prepare or heat up larger amounts of food. It doesn’t take up as much space as the Coleman and the burner seems to work better for simmering and keeping food warm.

primus-gravity
Primus Gravity camping stove

For us, we find that the big propane stove is often overkill since many times there is only the two of  us and we have simplified our camp cooking to a lot of dehydrated meals which only require boiling water. So we first started with a Primus Gravity (discontinued) backpacking stove that uses blended isobutane and propane fuel canisters. This worked great on our first couple of trips and the low and wide style of the stove is very stable and because of the huge burner this is a great stove for larger pots and pans. The remote canister style stove also allows for a windscreen to be used in windy conditions. This stove is still used in our kit for cooking and heating up food and is perfect for small groups. We have noticed that the built-in starter does not always work and boiling water at higher altitudes or in very cold weather takes a long time, so this motivated us to try another type of stove…

jetboil-gcs
JetBoil Group Camping System

Integrated stoves like the JetBoil have gained popularity for its ease of use and its ability to very quickly and efficiently bring water to a boil. These are great at what they are designed for but most of these systems are not designed for cooking or heating up food. After researching a bit we decided on the JetBoil Group Cooking System, which is no longer being made. This system uses a 1.5L pot with a finned bottom that concentrates the heat into the pot. This works fairly well and you can boil a large pot of water in less than 5 minutes. This system also allows you to heat up a pot of stew or cook pasta which makes it very versatile. However, the drawbacks of this system are much like all of the blended fuel stoves in that they suffer in the high altitude and very cold weather. Plus the tall design of the stove is a little unstable and windscreen use is somewhat risky as there is a danger of overheating the canister. But overall we like this stove and it almost always travels with us.

If you are really camping in high altitudes or very cold conditions then a liquid fuel stove is the way to go but those stoves are not as easy to use, as they require priming before each use. They are also prone to leakage and spills if not closed properly and we have heard a number of stories of near tragedy due to fuel spills or leakage. Because of the style camping we do and my personal preference for ease of use, we have stayed away from the liquid fuel stoves although I can see its value in its versatility and flexibility and in the future we may have to give one a try.

Fuel canister types

Ultimately you must choose your stove based on your personal preferences and circumstances but for car camping you really can’t go wrong with a propane camp stove like the Coleman mentioned earlier. If you really want to step it up though, the Camp Chef Everest stove is very highly rated. At a steep $120 for full retail it is about twice the cost of the Coleman but with two 20,000 BTU rated burners and all stainless steel construction, you’ll be passing this stove along to your grandchildren and it’ll still be a solid choice for a car camping stove!

Camp Chef Everest 2
Camp Chef Everest 2


That’s it for Part One, next time we’ll cover Mess Kits, Utensils and Cleaning. Thanks for reading and remember to find your adventure where ever you may wander!

Follow us on instagram @adventurenotincluded or for more photos, check out our Flickr account here.


20161018 – Five Car Camping Essentials

Planning a multi-day backpacking trip can be daunting, deciding what to bring and what to leave behind for space and weight savings can be agonizing. Many times through trial and error you learn what works and what doesn’t and you begin to carefully craft your packing list. Car camping is much more forgiving. Items that are too heavy for backpacking can now be brought along. Items sacrificed due to weight and space can help bring a little more comfort to your campsite. This post is to cover some of the very basic items that you will need. If you are just looking for a comprehensive list, check here at REI.com…

dsc_0059
Assorted styles from backpacker to family

#1 – Tent  For years we used a three man Coleman tent we bought at Wal-Mart, much like this one here. This little tent served our car camping needs for many years until we wanted to go backpacking and we upgraded to the REI Half Dome tent similar to this one. Lightweight and small, the Half Dome served as our shelter for many trips until recently when we purchased a rooftop tent from Front Runner Outfitters which now serves as the official *Adventure Not Included basecamp. If you keep your eyes out for sales you can pick up a good tent for car camping for less than $40, for example this one from Big 5 Sports on sale for $30 until this weekend. Keep in mind that these inexpensive tents are not good in inclement weather, in fact few but the very best made tents will stand up to heavy rain or hard winds but unless you want to drop $500-600 on a tent from Northface or Mountain Hardwear, retreating to a local rooming establishment is your best option. Trust us when we say, sleeping in a 3 season tent in gale force winds or below freezing temperatures is not much fun and there is no shame in staying at a nearby motel for the night. Sleeping in your car is always an option but it is not very comfortable. Since our Half Dome tent has gone MIA, our personal choice for our next tent is most likely the REI Passage for the light weight, double doors, ease of setup and good reviews.

mojave-wander-029
Front Runner Outfitters rooftop tent
ec1ce820-e007-47a3-8908-359d38e36d77
ALPS Mountaineering mummy bag

#2 – Sleeping bag and #3 – Sleeping Pad  There are many choices here but the best and warmest option we have found is a good fitting mummy bag. The fit is important because if the bag is too tight you will be uncomfortable and if it is too big you’ll have a hard time staying warm. If you are backpacking, finding the perfect balance between weight and warmth is important. Car camping however is much more forgiving and I would place a greater emphasis on warmth. You can always open up the bag to vent some warm air but you’ll never be able to generate more heat from a light bag. Personally we use ALPS Mountaineering mummy bags that are rated to about 30 degrees. We got them from the REI outlet for about $80 each and they have been great for us. We have slept in colder temperatures with these but we would not recommended to use them below about 40 degrees without an additional liner or blanket. If you never plan on sleeping out in the cold there is nothing wrong with the classic style sleeping bag from Wal-Mart that you can pick up for about $25.

One of the essential items that go along with the sleeping bag is a sleeping pad. We currently use the Therm-A-Rest 3/4 length pads which are self-inflating pads that are intentionally short to save space and weight. These three quarter style pads only provide cushioning for the upper body and hips and work very well for our older frames when sleeping on the ground. Sleeping pads accomplish two things, providing a little padding and insulating you from the cold ground which can quickly sap the warmth from your body. Some people might prefer an air mattress but they don’t always fit inside the tent and they are prone to leakage. If you go this route, make sure that the mattress fits inside your tent before you take it out for the first time.


daves-bachtrip-0124
Camp chairs make camp life better!

#4 – Camp Chair  Although some might think this is not an essential item, this can make a huge difference in making your camping trip a more comfortable experience. It never fails that someone is ALWAYS sitting in my camp chair around the fire at the end of the day because they didn’t bring their own. The uses are not limited to camping either, we use ours at the park, tailgates, backyard and even the garage. Although they make a lot of different styles, you just can’t beat the basic collapsing camp chair. Outdoor Gear Labs even did some testing on several different types of camp chairs and this ALPS Mountaineering model was the winner. But at $60 can you really see much difference in the $7 Ozark Trail model? Yes, the ALPS model looks heavier and the max capacity of the chair is 800lbs compared to the 225lb weight limit of the Ozark model but it also weighs 13lbs compared to the less than 5lb weight of the Wal-Mart chair. I’m sure that the ALPS model will last quite a long time but I can’t see dropping that much coin on a camp chair that’s ultimately gonna get used and abused. The Ozark Trail chairs aren’t the most durable things in the world but ours have lasted through many desert camping trips and beat sitting on a rock!

253303_28210_l2
ALPS Mountaineering camp chair
915236dc-22a6-4ddc-b62c-1110ddc79c66_1-6ad4633a54d57707474826efe53f0ab7
Ozark Trail camp chair
dsc_0198_dinnerbyheadlamp
Dinner by headlamp

#5 – Headlamp  Another indispensable item that every camper should have, headlamps will make your life easier. Imagine this scenario… it’s late at night, you were fast asleep in your tent but now… nature is calling and you can’t ignore it any longer. Okay, look for your flashlight… where is it?!? Oh, okay it rolled over to the other side of the tent… okay, open the zipper and try to get your shoes on, all while fumbling with the flashlight. Switching hands, under your arm, pinched at your neck… wow, this would be nicer if I had BOTH hands free! OK, so do I need to continue?? The LED headlamp is a great innovation in camping technology that everyone should be using. Hands-free, lightweight, bright easy to direct beam and can be found for a low cost. This really is an essential item and these Black Diamond models are really great value and are highly recommended by many hikers and campers.

Personally, we use the Enduro model from Streamlight because I’m a Streamlight fanboy and own a couple of lamps from them. Powered with two AAA batteries and providing 6 hours of continuous light on high, durable, powerful and light. we’ve had these headlamps for a few years now and I use them all the time around the house, on the car and in the backyard, anywhere I need a hands-free light. Not to mention that it makes answering the call of nature in the middle of the night SO much easier without fumbling around with a flashlight!

20161018_223516
Streamlight Enduro headlamp


So that’s it, those are the first five essential items to have to go car camping. That wasn’t so bad was it?? Next time we’ll cover some essentials for one of the most important parts of camping…  COOKING!  Thanks for reading and remember to find your adventure where ever you may wander!

Follow us on instagram @adventurenotincluded or for more photos, check out our Flickr account here.