20161118 Tread Lightly Principles – Part Two

Carrizo Plain NM
Carrizo Plain NM

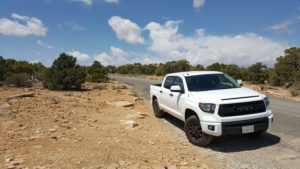
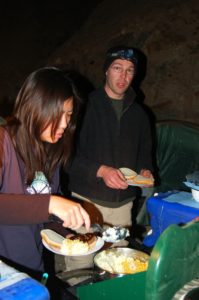
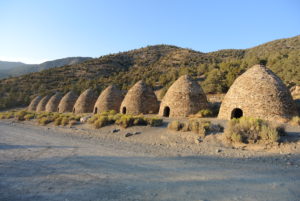
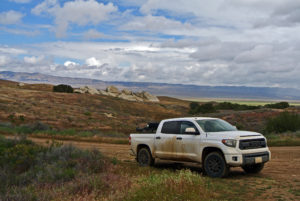
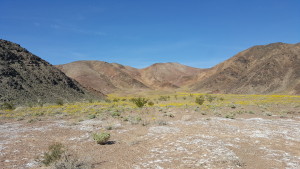
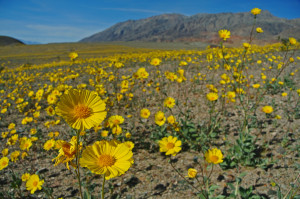
There is nothing quite like waking up with the sun gently filtering into your tent, the cool morning air urging you to get up. There is nothing better than that first cup of coffee while out in the back country and I strongly feel that the smell of bacon cooking in the great outdoors is one of life’s greatest pleasures. For many families, camping has become somewhat of a budget friendly tradition. Camping is perhaps the original ecotourism, a couple of days camping and you can gain a greater appreciation for nature, gain personal enrichment and environmental awareness. Combine that with the potential for exercise and education and you have all the ingredients for a great family vacation.

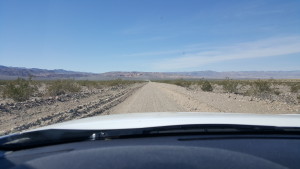
But the choices you make can have an effect on the environment and can actually inflict harm onto the area in which you camp. Here is where the Tread Lightly principles come into play. Here are ten ways you can minimize negative impacts when camping…


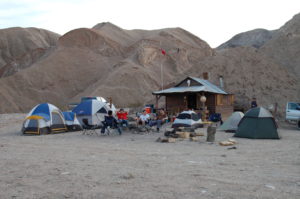
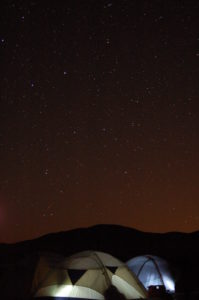
1.  Whenever possible, use existing campsites and camp on durable surfaces and place tents on a non-vegetated area. Creating new sites can permanently scar the landscape and removing plants promotes erosion that can further damage the area.

dsc_4960
Mahogany Flats Campground – Death Valley NP

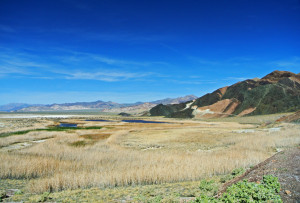
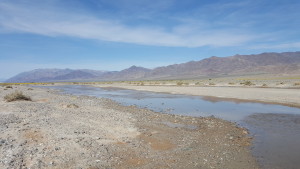
2.  Camp a least 200 feet from water so that you don’t disturb wildlife that may rely on that water and when camping in the backcountry disperse your campsite at least 200 feet from trails and other campsites to minimize impact.

mojave-wander-031
Bachelor Wash – Mojave NP

3.  Pack out what you pack in and carry a trash bag to pick up litter left by others. If possible, take the garbage and recyclables home for disposal. Do not leave garbage at your campsite as this attracts animals and conditions them to think of humans as sources of food.

4img_2132Consider food options with minimal packaging or repack your foods in resealable, reusable containers to reduce the amount of trash you generate.

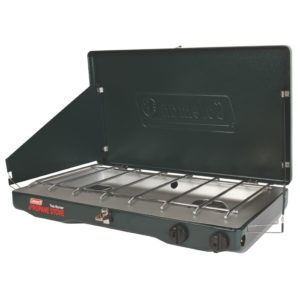
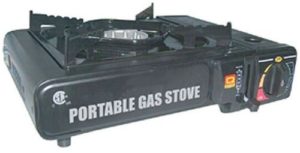
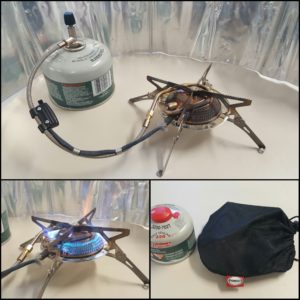
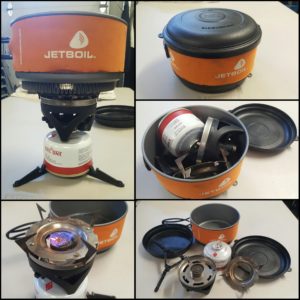
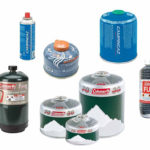
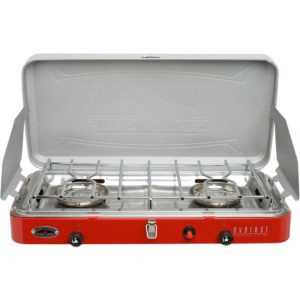
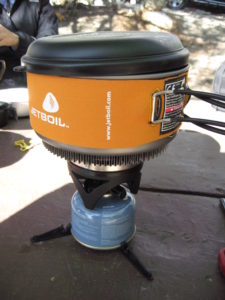
5.  For cooking, consider using a camp stove instead of a campfire. Camp stoves create less of an impact on the land and are much more efficient.

6.  img_1693
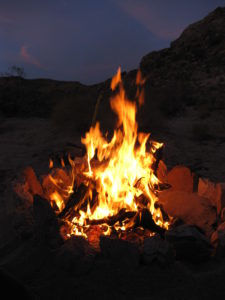
Observe all fire restrictions and observe all rules regarding fires according to the area that you are camping in. If you build a fire, use existing fire rings or use a fire pan. If allowed, use only fallen timber for campfires, do not cut standing trees or limbs. Keep a 10-foot diameter area around the campfire clear of any flammable materials and make sure there aren’t any tree limbs or flammable objects hanging overhead.

7.  Allow the wood to burn down to a fine ash, if possible. Pour water on the fire and drown all embers until the hissing sound stops. Stir the campfire ashes and embers until everything is wet and cold to the touch. If you don’t have water, use dirt.

8.  Detergents, toothpaste and soap can harm fish and other aquatic life. Try to use a biodegradable, plant-based soap so it won’t harm the surrounding environment. Keep grey water 200 feet away from water sources and scatter your gray water so it filters through the soil and to avoid attracting animals directly to your site.
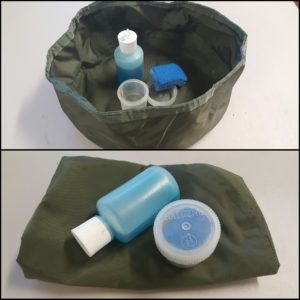
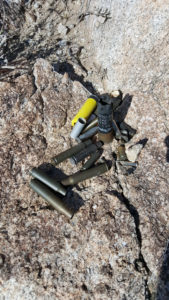
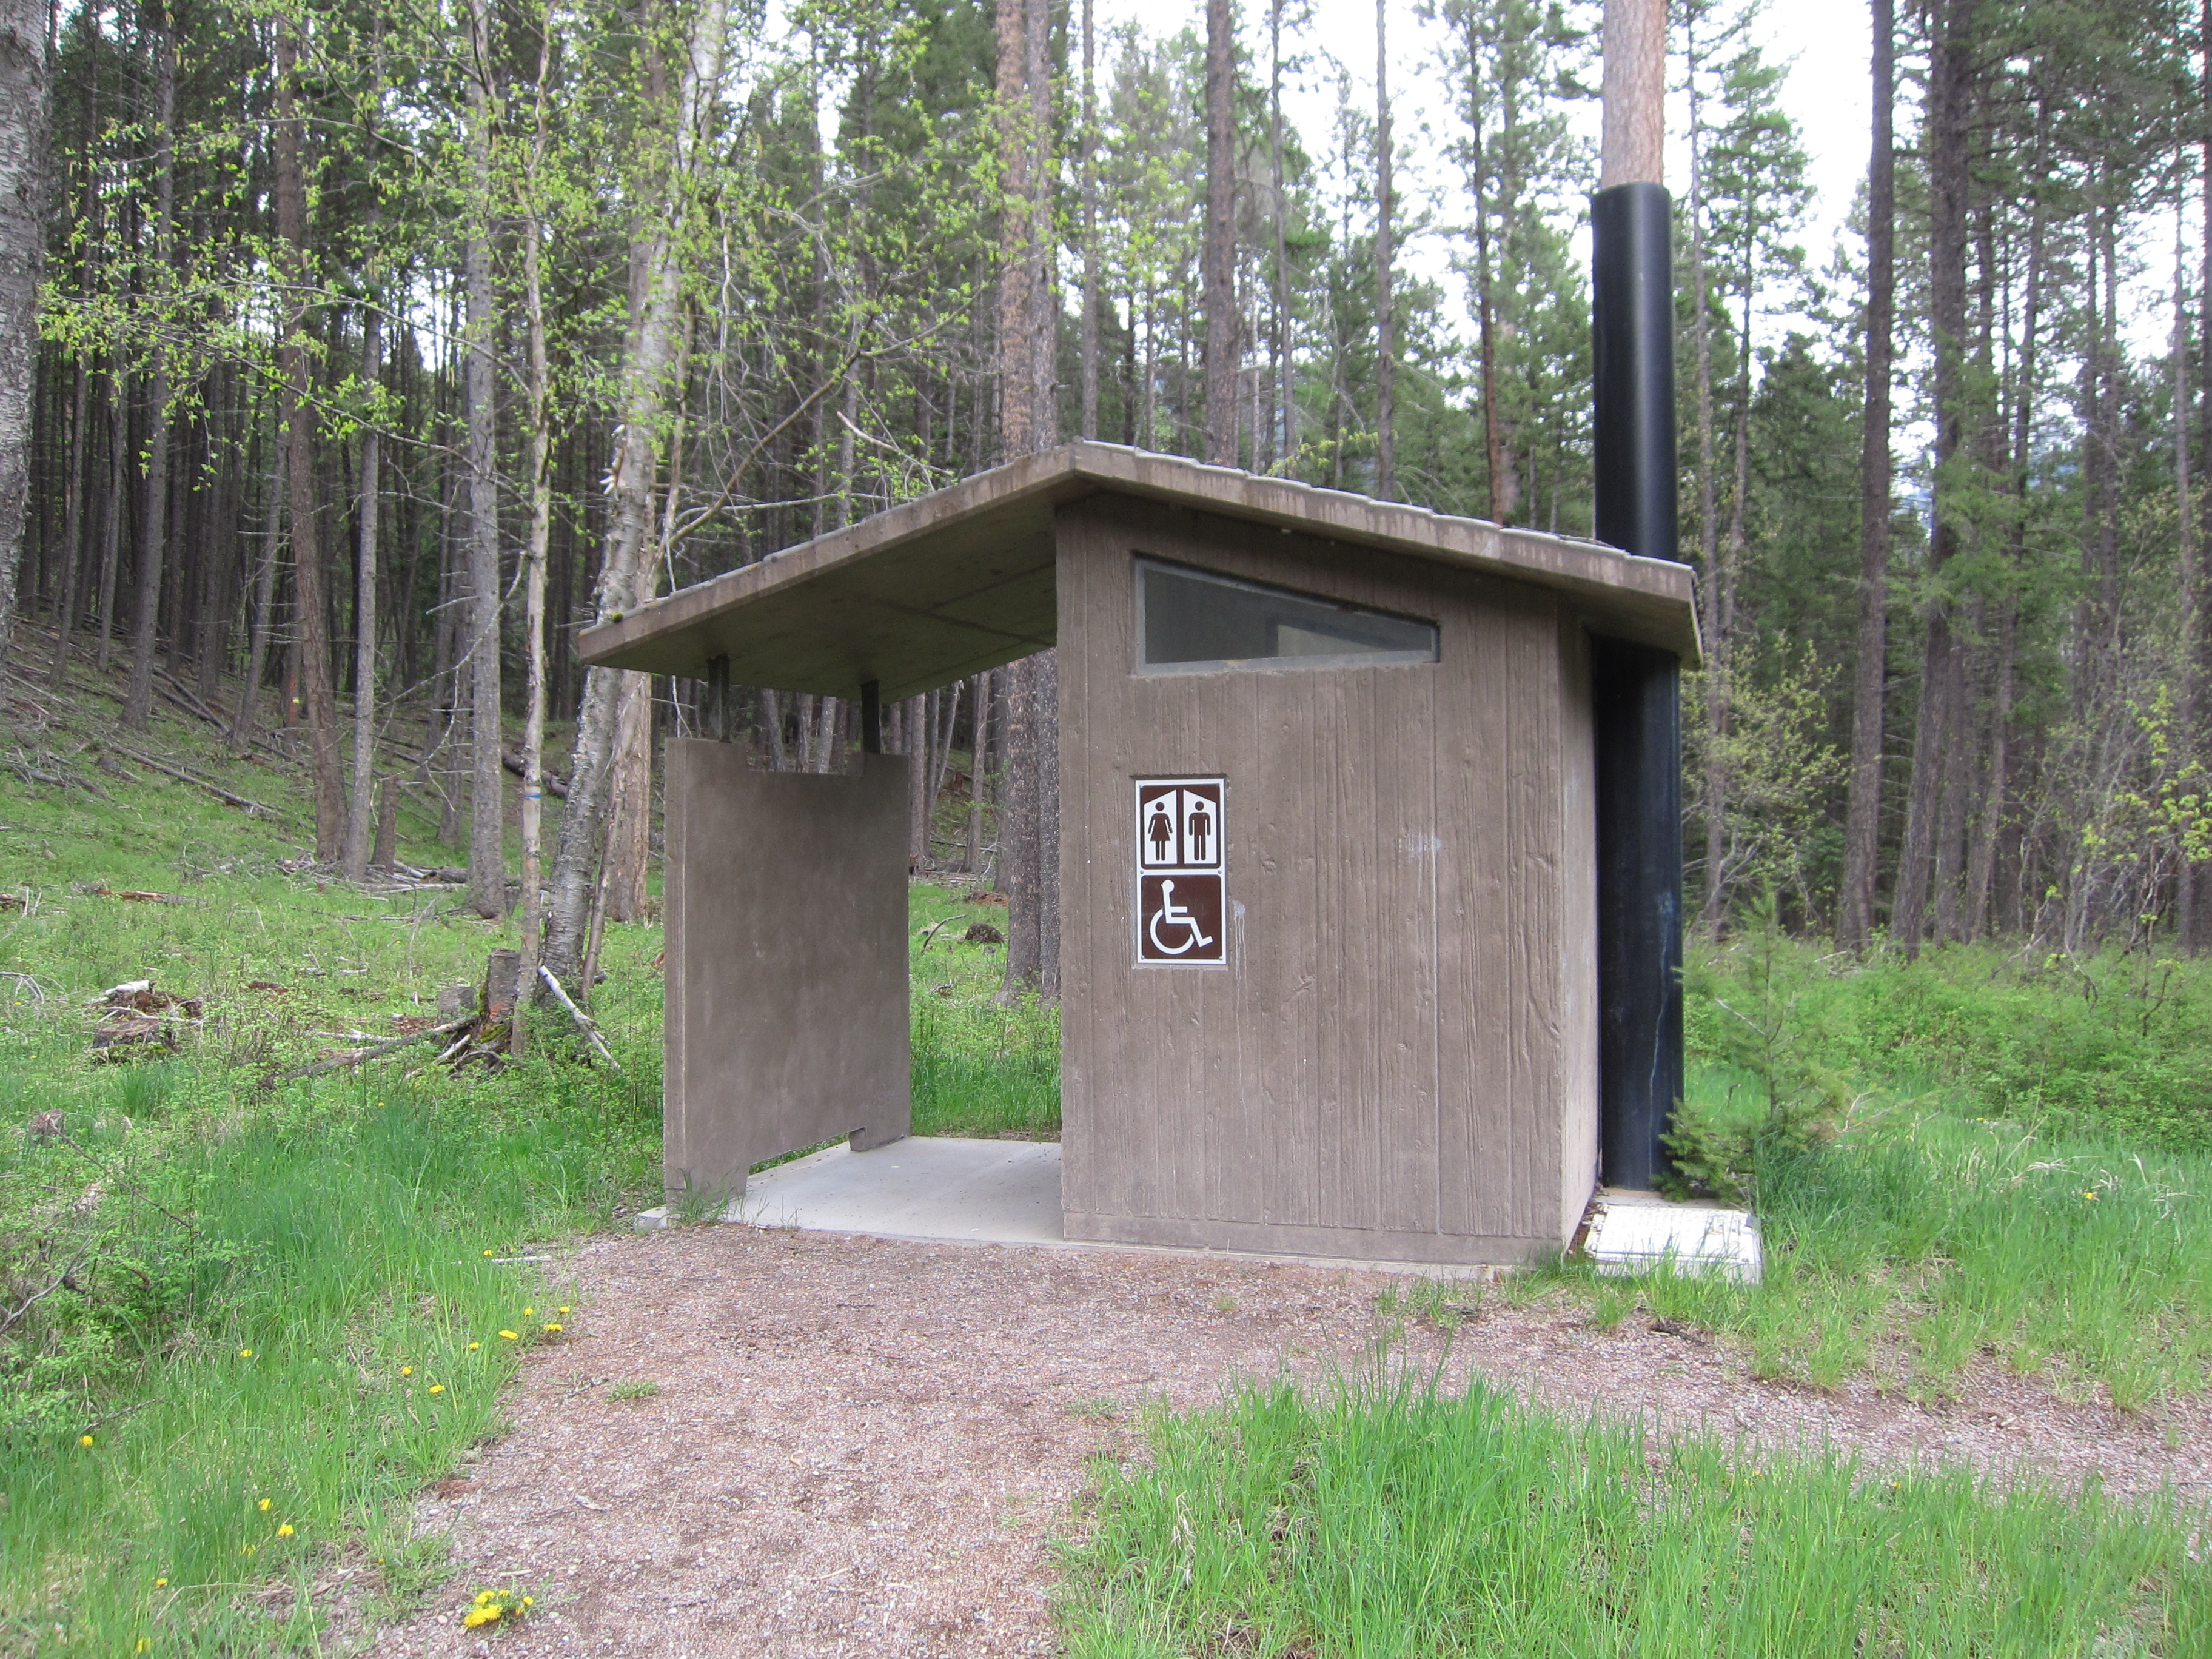
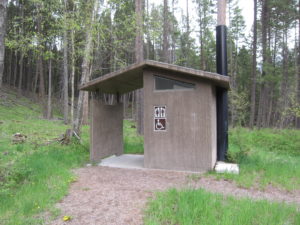
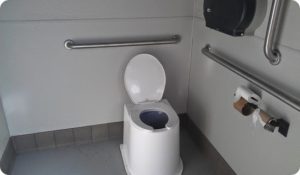
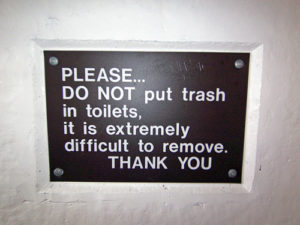
photogrid_1477030084257

9.  imagesIn areas without toilets, use a portable latrine if possible and pack out your waste. If you don’t have a portable latrine, you may need to bury your waste. Human waste should be disposed of in a shallow hole six to eight inches deep at least 200 feet from water sources, campsites or trails. Cover and disguise the hole with natural materials. It is recommended to pack out your toilet paper. High use areas may have other restrictions, so be aware of local regulations.

10.  Following a trip, wash your gear and vehicle to reduce the spread of invasive species.


There you have it, ten tips so you can go camping and reduce your impact on the environment! If we all do our part to Tread Lightly, we can all enjoy our wonderful outdoors together. Thanks for reading and remember to find your adventure where ever you may wander!

Follow us on instagram @adventurenotincluded or for photos of our adventures, check out our Flickr account here.

20161112 – Tread Lightly Principles – Part One

As promised, here is the first of a two part series discussing the Tread Lightly principles… to be honest when we first starting heading out to explore the great outdoors I had never heard of the Tread Lightly principles and when I finally did hear about them I didn’t pay much attention. For the most part we tried to be conscientious when we were outdoors but some of the things we learned just from being out there. Now as more and more people are heading outside for the first time to enjoy their National Parks and backcountry there is a greater need than ever for all of us to be aware of and follow these simple guidelines so that all of us can enjoy the natural beauty and majesty of the outdoors. The Tread Lightly principles help us to minimize our impact to the environment and teach responsible outdoor etiquette. For more information please go to www.treadlightly.org to learn more tips or how you can be more involved in stewardship projects.tl-logo

Travel Responsibly by staying on designated roads and trails. If possible, go over obstacles instead of going around and widening the trail. Cross streams only at designated areas and minimize splashing and stirring up sediments. When possible, avoid wet or muddy trails to reduce erosion and rutting. When on water, stay on designated waterways and launch your watercraft in designated areas.

utahbigfive0079b
Turn off on the Burr Trail in Canyonlands NP

Respect the Rights of Others including private property owners, recreational trail users, campers and others so they can enjoy their recreational activities undisturbed. While on designated trails or roads, leave gates open or closed as you found them. Yield right of way to those passing you or going uphill and understand trail sharing etiquette. When on water, respect anglers, swimmers, skiers, boaters, divers and those on or near the shore.

share-our-trails-graphic
Trail Sharing

Educate Yourself prior to your trip by obtaining maps of the area and get to know the restrictions and regulations from public agencies for where you are going. Plan for your trip by taking recreational skills classes, checking the weather forecast and familiarize yourself with your equipment and how to operate it safely.

taft-point-sentinel-dome
topo maps are very useful

Avoid Sensitive Areas such as meadows, lake shores, wetlands and streams. Stay on designated routes to protect yourself and wildlife habitats and sensitive soils from damage. Do not disturb historical or archeological sites. When on water, avoid operating your watercraft in shallow water or near shorelines at high speeds.

dsc_0155-black-tank-wash
Petroglyphs in Mojave NP

Do Your Part by modeling responsible behavior by leaving the area better than you found it. You can do this by properly disposing of waste and trash, minimize the use of open fires, avoid the spread of invasive plants and animals and avoiding damage to sensitive areas.mojave-wander-044

The next part of this series will cover some specifics for applying Tread Lightly principles while camping. Thanks for reading and remember to find your adventure where ever you may wander!

Follow us on instagram @adventurenotincluded or for photos of our adventures, check out our Flickr account here.

20161107 – How to Properly Use a Pit Toilet

With an upcoming car camping trip planned for this month and with some of you never having camped before, I thought I’d go over a subject that few others would probably talk to you about. It’s not that it isn’t important, it is very important but some of these things come automatically and some are learned over the years. The first thing to remember is that a pit toilet is your friend. You may not think of it but without that pit toilet you may well be faced with some of life’s crueler options to relieve oneself… the port-a-potty for one… and the field toilet, bag in a bucket as another. For me personally, digging a hole in the ground is much preferable to either one but after being in rural China and seeing the concrete ditch with no walls option, I am happy with a pit toilet. That being said, it is a gamble every time you approach one of these concrete bunkers… Is this a pristine, rarely used but regularly maintained toilet? Or is this a heavily trafficked and disgusting pit of human suffering? You can never tell… pittoilet

So here are eight things to remember when visiting your friendly neighborhood pit toilet:

  1.  Look down but don’t linger… it’s good to take a quick look down to make sure it’s not flooded or overflowing. Getting splashed by that brine of human waste would certainly ruin your day but no need to stare, you won’t find anything of value down there, trust me…

    0
    Are you going to go down and get it?
  2. Lock the door. This may seem like a slam dunk but with all the nervousness of trying to remember the 8 items on this list you might forget and if you do you’ll certainly ruin someone else’s day as well.keep-calm-and-lock-the-door-2
  3. Check for toilet paper. Or even better, bring your own! I always carry toilet paper in the car for just that reason, just as an example, on our last group camping trip we managed to go through all five rolls that were in the toilet at the beginning of our trip. If you didn’t bring any, even though I strongly suggested it, you may have had to go begging among your fellow campers.imag2995_thumb3
  4. Secure your belongings… Don’t sit down yet! Make sure that all hats, glasses, cameras, cellphone, etc are secure and won’t tumble into the ever after, and if it does, well that leads us to the next item…

    safety2
    This here’s the wildest ride in the wilderness!
  5. Don’t throw trash down there. Most likely there will be a sign stating just that, don’t be an idiot, don’t do it. Everything that goes down there must be brought back out via a huge vacuum and trash can stop up the process. Imagine the work needed to UNSTOP that trash that’s now stuck in the vacuum. I’d rather not think about that… blogpittoiletsign
  6. Breathe through your mouth and take shallow breaths. I shouldn’t have to explain that you are sitting on a mountain of human waste and taking deep breaths through your nose would be an exceedingly bad idea. This is not the time to compose an Instagram post, be efficient and get out of there, especially when you have others waiting to use the same toilet!texting_on_the_toilet_bathroom_without_my_phone_was_weird
  7. Put down the cover. Again, this might seems small but I’m disgusted every time I enter a pit toilet and the lid is wide open. Keeping the lid closed keeps the odor of a thousand bowel movements somewhat contained and it also keeps the number of flies down. Yes, that same fly that just landed on your sandwich… Gross? Yup! so CLOSE THE LID!2fe3053900000578-3388799-image-a-10_1452179741419
  8. Bring hand sanitizer. If you are using a pit toilet you are most likely in an area that does not have running water so hand sanitizer is an essential item. Occasionally there is a dispenser of sanitizer there by the door but about half the time I find these are empty so it’s better to bring your own.dirty_hands

There you have it, that wasn’t so bad was it? Now you are fully prepared to take on the pit toilets of the world and be a little more appreciative of their existence. Thanks for reading and remember to find your adventure where ever you may wander!

Follow us on instagram @adventurenotincluded or for photos of our adventures, check out our Flickr account here.

20161023 – Car Camping Cooking Essentials, Part Two – Mess Kits, Utensils and Cleaning

coleman-mess-kit
Coleman 5 pc Mess Kit

Mess kits –  these can range widely from the super-duper, extra fancy and lightweight titanium nesting sets from a manufacturer like Snow Peak all the way to the super cheap plastic dinnerware sets. When we first started camping we bought most of our gear from Wal-mart, this was the most convenient and cheapest way to go and you can still find some really good deals there. The very first mess kit we bought was this 5 piece set from Coleman.  Super cheap and light I thought this was the perfect set but it unfortunately did not live up to our needs and we ended up using them as just plates and bowls and cooking in actual pots and pans we raided from the kitchen.

81wljcxgazl-_sl1500_
Coleman Max 4pc Set

This led to us purchasing some Coleman enamelware to use as plates and dishes and while we found that they were very durable, they were too heavy and bulky,meant more for a backyard BBQ or picnic rather than camping, especially if we were going to do some backpacking. This led us back to the store to check out other lightweight options and we found the Coleman Max anodized cook set. This set was similar to other much more expensive sets but at the Coleman price point it was perfect for us. Unfortunately for you they no longer carry this model and they did not make a replacement but there are several off-brand types available on Amazon like this very similar set here.

51ngx-tm0xl-_sl1024_
Nesting Cookware Set

For a single person or couple this is the perfect setup for heating and cooking individual meals. That is unless you are a real camp cook gourmet, then you’ll need to have your Lodge Cast Iron set! I’ve seen my niece cook some AMAZING things in her cast iron pots and pans and there is no better smell in the world than bacon cooking on a cast iron pan in the morning!

If you are looking for something a little nicer or you have a family this setup from Mountain Summit Gear is really nice and at a midrange budget the perfect set if you plan on doing a lot of camping. We still use the Coleman Max set as our personal cups and bowls but we have gotten very simple and eating dehydrated food that only requires boiling a cup of water and so we have reduced the need for cookware. If this is your first time camping you could always steal a pot from the kitchen and bring some plastic utensils and paper plates, it can be that simple! But, if you plan on camping with any regularity you should invest in a simple cookware and utensil set. This is better overall for the environment and gives you flexibility in your food prep as well.

41sbvum3igl
Cheap IKEA set


Utensils – If you are my wife this section is totally useless, no matter what nifty tool I get or light, flexible, foldable, indestructible utensil I find, my wife uses a pair of disposable chopsticks to cook, eat and prep food. She believes that all of her ancestors have cooked outdoors using nothing but chopsticks so that’s all she needs about 99% of the time. The other 1% she begrudgingly uses a couple of inexpensive .$99 store nylon tools that for the most part work okay and you won’t feel bad if they melt, break or walk away.

51v3ilfvpsl-_sl1024_
Metal tongs work the best!

One item that I have found is really useful is a cheap pair of metal tongs. Metal and not plastic or nylon as those tend to bend and flex too much. Again, you don’t need to spend much on them as they will break or get lost sooner or later. I have been thinking about replacing our current set of tools with these from JetBoil since they break down to fit into the pot and they are relatively inexpensive. On the other hand, my wife has a point about the chopsticks… once you are done with them you can just throw them into the fire!

06e8f59a-4c94-4865-a194-a414fab2551f
JetBoil Cooking Utensils
51bydqxqxnl-_sl1000_
ceramic paring knife with cover

The last two items really make campsite cooking easier as well. We’ve been using a small ceramic cooking knife with cover and flexible cutting boards and they work out great. From cutting up fruit and vegetables to slicing cheese or a nice steak, having a nice sharp blade is very useful and the cover keeps the blade clean and safely stored. The cutting boards are great for throwing down on a nasty old picnic table to keep your food prep area relatively sanitary. We’ve found these two items really useful in general.

Flexible cutting boards

Now that we have covered cooking utensils you’ll also want something to eat with. Again, according to my wife you would just eat with the chopsticks that you cooked with… and she does have a point. But once in awhile you’ll need something more than a pair of sticks. When we first started camping I bought a pair of military style fork, spoon and knife sets in the center picture. These worked great and we still have them in our kit but they are little big and bulky so when we went backpacking we upgraded to the nylon fork and spoon combo at the bottom. These combo utensils are light and nearly indestructible but they come up a little short when you are trying to dig out the last bites of that Mountain House bag! Later on we ended up getting a couple of titanium utensils when they were on sale. Super light and super strong but also not cheap. In the end, for car camping or new campers, grabbing a set of the military or nylon combos are great. If this is your first trip, go with a set of plastic and wash them after your meal!

photogrid_1477030574959
(top) titanium spork (middle) military mess kit (bottom) nylon combo

Cleaning – This of course is everyone’s favorite part of camping! This can really be a chore, especially at a campsite with no running water but we have found that cleaning up pots and dishes are a lot easier with this simple folding camp sink. Ours is an old military style collapsible wash basin and are harder to find. The newer styles are a little better at holding up after they are filled but ours is super light and small once folded up. Along with the wash basin is a simple squeeze bottle of dishwash soap and a Scotchbrite Blue sponge that I cut into quarters and stuff into a Nalgene container to keep it clean and from getting other stuff wet.

photogrid_1477030084257
Our dishwashing setup

Some like to use rubbermaid containers, plastic shoeboxes, all the way up to this contraption here. Whatever you use just remember to get rid of your dirty dishwater away from your campsite and disperse the water so the scent is not concentrated in one area and well away from any water sources. Soaps and detergents can be harmful to aquatic life and the scent can and will attract rodents and even larger animals like coyotes to your campsite so keeping clean and following “Tread Lightly” principles are important.

What? You don’t know what Tread Lightly means? Well, check out this site for more information and look for a future blog post on the subject.  Thanks for reading and remember to find your adventure where ever you may wander!

Follow us on instagram @adventurenotincluded or for more photos, check out our Flickr account here.


20161020 – Car Camping Cooking Essentials, Part One – Campstoves

71gu2srxzol-_sl1500_
Coleman propane camp stove

Campstoves  –  If you’re gonna cook while camping (yes that is a choice as there are some that adhere to a no-cook camping lifestyle) you’re gonna need something to cook with and the choices are plentiful. There are some who stick with the tailgater style propane grills, the old-school Coleman propane stove, butane canister stoves, isobutane stoves, integrated stoves and the liquid fuel bottle stove. Since we are talking about car camping here I’m gonna stick with the most popular ones. First up is the OG camping stove, the Coleman propane stove. We used one for years and then gave it away and got another one and gave that one away too, each time thinking that we have graduated from the classic propane stove. But it’s a classic for a reason, easy to use, inexpensive and  readily available fuel and great cold weather performance makes this a great stove for any car camper.

41cwpjlrggl
Portable butane stove

One option that we have seen and we have tried it ourselves is the butane stove. Most of our Asian friends out there will be familiar with this type of single burner butane stove (hot pot or Korean BBQ anyone??). It burns very efficiently and provides great heat, it’s light and inexpensive but the canisters are not as readily found and it suffers in altitude or colder climates.  This is our current option when we go group camping and need to prepare or heat up larger amounts of food. It doesn’t take up as much space as the Coleman and the burner seems to work better for simmering and keeping food warm.

primus-gravity
Primus Gravity camping stove

For us, we find that the big propane stove is often overkill since many times there is only the two of  us and we have simplified our camp cooking to a lot of dehydrated meals which only require boiling water. So we first started with a Primus Gravity (discontinued) backpacking stove that uses blended isobutane and propane fuel canisters. This worked great on our first couple of trips and the low and wide style of the stove is very stable and because of the huge burner this is a great stove for larger pots and pans. The remote canister style stove also allows for a windscreen to be used in windy conditions. This stove is still used in our kit for cooking and heating up food and is perfect for small groups. We have noticed that the built-in starter does not always work and boiling water at higher altitudes or in very cold weather takes a long time, so this motivated us to try another type of stove…

jetboil-gcs
JetBoil Group Camping System

Integrated stoves like the JetBoil have gained popularity for its ease of use and its ability to very quickly and efficiently bring water to a boil. These are great at what they are designed for but most of these systems are not designed for cooking or heating up food. After researching a bit we decided on the JetBoil Group Cooking System, which is no longer being made. This system uses a 1.5L pot with a finned bottom that concentrates the heat into the pot. This works fairly well and you can boil a large pot of water in less than 5 minutes. This system also allows you to heat up a pot of stew or cook pasta which makes it very versatile. However, the drawbacks of this system are much like all of the blended fuel stoves in that they suffer in the high altitude and very cold weather. Plus the tall design of the stove is a little unstable and windscreen use is somewhat risky as there is a danger of overheating the canister. But overall we like this stove and it almost always travels with us.

If you are really camping in high altitudes or very cold conditions then a liquid fuel stove is the way to go but those stoves are not as easy to use, as they require priming before each use. They are also prone to leakage and spills if not closed properly and we have heard a number of stories of near tragedy due to fuel spills or leakage. Because of the style camping we do and my personal preference for ease of use, we have stayed away from the liquid fuel stoves although I can see its value in its versatility and flexibility and in the future we may have to give one a try.

Fuel canister types

Ultimately you must choose your stove based on your personal preferences and circumstances but for car camping you really can’t go wrong with a propane camp stove like the Coleman mentioned earlier. If you really want to step it up though, the Camp Chef Everest stove is very highly rated. At a steep $120 for full retail it is about twice the cost of the Coleman but with two 20,000 BTU rated burners and all stainless steel construction, you’ll be passing this stove along to your grandchildren and it’ll still be a solid choice for a car camping stove!

Camp Chef Everest 2
Camp Chef Everest 2


That’s it for Part One, next time we’ll cover Mess Kits, Utensils and Cleaning. Thanks for reading and remember to find your adventure where ever you may wander!

Follow us on instagram @adventurenotincluded or for more photos, check out our Flickr account here.


20161018 – Five Car Camping Essentials

Planning a multi-day backpacking trip can be daunting, deciding what to bring and what to leave behind for space and weight savings can be agonizing. Many times through trial and error you learn what works and what doesn’t and you begin to carefully craft your packing list. Car camping is much more forgiving. Items that are too heavy for backpacking can now be brought along. Items sacrificed due to weight and space can help bring a little more comfort to your campsite. This post is to cover some of the very basic items that you will need. If you are just looking for a comprehensive list, check here at REI.com…

dsc_0059
Assorted styles from backpacker to family

#1 – Tent  For years we used a three man Coleman tent we bought at Wal-Mart, much like this one here. This little tent served our car camping needs for many years until we wanted to go backpacking and we upgraded to the REI Half Dome tent similar to this one. Lightweight and small, the Half Dome served as our shelter for many trips until recently when we purchased a rooftop tent from Front Runner Outfitters which now serves as the official *Adventure Not Included basecamp. If you keep your eyes out for sales you can pick up a good tent for car camping for less than $40, for example this one from Big 5 Sports on sale for $30 until this weekend. Keep in mind that these inexpensive tents are not good in inclement weather, in fact few but the very best made tents will stand up to heavy rain or hard winds but unless you want to drop $500-600 on a tent from Northface or Mountain Hardwear, retreating to a local rooming establishment is your best option. Trust us when we say, sleeping in a 3 season tent in gale force winds or below freezing temperatures is not much fun and there is no shame in staying at a nearby motel for the night. Sleeping in your car is always an option but it is not very comfortable. Since our Half Dome tent has gone MIA, our personal choice for our next tent is most likely the REI Passage for the light weight, double doors, ease of setup and good reviews.

mojave-wander-029
Front Runner Outfitters rooftop tent
ec1ce820-e007-47a3-8908-359d38e36d77
ALPS Mountaineering mummy bag

#2 – Sleeping bag and #3 – Sleeping Pad  There are many choices here but the best and warmest option we have found is a good fitting mummy bag. The fit is important because if the bag is too tight you will be uncomfortable and if it is too big you’ll have a hard time staying warm. If you are backpacking, finding the perfect balance between weight and warmth is important. Car camping however is much more forgiving and I would place a greater emphasis on warmth. You can always open up the bag to vent some warm air but you’ll never be able to generate more heat from a light bag. Personally we use ALPS Mountaineering mummy bags that are rated to about 30 degrees. We got them from the REI outlet for about $80 each and they have been great for us. We have slept in colder temperatures with these but we would not recommended to use them below about 40 degrees without an additional liner or blanket. If you never plan on sleeping out in the cold there is nothing wrong with the classic style sleeping bag from Wal-Mart that you can pick up for about $25.

One of the essential items that go along with the sleeping bag is a sleeping pad. We currently use the Therm-A-Rest 3/4 length pads which are self-inflating pads that are intentionally short to save space and weight. These three quarter style pads only provide cushioning for the upper body and hips and work very well for our older frames when sleeping on the ground. Sleeping pads accomplish two things, providing a little padding and insulating you from the cold ground which can quickly sap the warmth from your body. Some people might prefer an air mattress but they don’t always fit inside the tent and they are prone to leakage. If you go this route, make sure that the mattress fits inside your tent before you take it out for the first time.


daves-bachtrip-0124
Camp chairs make camp life better!

#4 – Camp Chair  Although some might think this is not an essential item, this can make a huge difference in making your camping trip a more comfortable experience. It never fails that someone is ALWAYS sitting in my camp chair around the fire at the end of the day because they didn’t bring their own. The uses are not limited to camping either, we use ours at the park, tailgates, backyard and even the garage. Although they make a lot of different styles, you just can’t beat the basic collapsing camp chair. Outdoor Gear Labs even did some testing on several different types of camp chairs and this ALPS Mountaineering model was the winner. But at $60 can you really see much difference in the $7 Ozark Trail model? Yes, the ALPS model looks heavier and the max capacity of the chair is 800lbs compared to the 225lb weight limit of the Ozark model but it also weighs 13lbs compared to the less than 5lb weight of the Wal-Mart chair. I’m sure that the ALPS model will last quite a long time but I can’t see dropping that much coin on a camp chair that’s ultimately gonna get used and abused. The Ozark Trail chairs aren’t the most durable things in the world but ours have lasted through many desert camping trips and beat sitting on a rock!

253303_28210_l2
ALPS Mountaineering camp chair
915236dc-22a6-4ddc-b62c-1110ddc79c66_1-6ad4633a54d57707474826efe53f0ab7
Ozark Trail camp chair
dsc_0198_dinnerbyheadlamp
Dinner by headlamp

#5 – Headlamp  Another indispensable item that every camper should have, headlamps will make your life easier. Imagine this scenario… it’s late at night, you were fast asleep in your tent but now… nature is calling and you can’t ignore it any longer. Okay, look for your flashlight… where is it?!? Oh, okay it rolled over to the other side of the tent… okay, open the zipper and try to get your shoes on, all while fumbling with the flashlight. Switching hands, under your arm, pinched at your neck… wow, this would be nicer if I had BOTH hands free! OK, so do I need to continue?? The LED headlamp is a great innovation in camping technology that everyone should be using. Hands-free, lightweight, bright easy to direct beam and can be found for a low cost. This really is an essential item and these Black Diamond models are really great value and are highly recommended by many hikers and campers.

Personally, we use the Enduro model from Streamlight because I’m a Streamlight fanboy and own a couple of lamps from them. Powered with two AAA batteries and providing 6 hours of continuous light on high, durable, powerful and light. we’ve had these headlamps for a few years now and I use them all the time around the house, on the car and in the backyard, anywhere I need a hands-free light. Not to mention that it makes answering the call of nature in the middle of the night SO much easier without fumbling around with a flashlight!

20161018_223516
Streamlight Enduro headlamp


So that’s it, those are the first five essential items to have to go car camping. That wasn’t so bad was it?? Next time we’ll cover some essentials for one of the most important parts of camping…  COOKING!  Thanks for reading and remember to find your adventure where ever you may wander!

Follow us on instagram @adventurenotincluded or for more photos, check out our Flickr account here.

20160219 – Death Valley Superbloom

Follow us on instagram @adventurenotincluded or for more photos, check out our Flickr album here.

If you’ve been watching or reading the news in California recently you’ve probably been hearing about the “superbloom” that’s happening in Death Valley National Park. Although some of the stories out there are boasting that this is a once in a lifetime occurrence, it actually happens whenever the particular conditions are right. The last superbloom was in 2005 when that seasons rain and weather cooperated to result in an explosion of wildflowers throughout the park. This years El Niño brought the kind of soaking rains that were needed for the wildflower seeds to germinate and reports started coming in that a superbloom was beginning. Checking out the weather reports for the Valley showed highs in the low 80’s and clear weather for the weekend so I packed up some gear and my family to go check it out for ourselves!

Checking the Death Valley Road Conditions Facebook page told me that the 178 was closed between Shoshone and Jubilee Pass effectively closing off the only paved road coming up from the south of the park, exactly where we want to go… Luckily there is an option. Harry Wade Exit Route, a narrow and rough dirt road that follows the route that Harry Wade and his family found while escaping Death Valley and the ill fated 1849 caravan that found themselves lost in the Valley. Traveling along the southern border of the park before heading up the Amaragosa River valley joining Badwater Road just south of Ashford Mill. This is exactly where we want to be!

Just a quick word about the Harry Wade, although it is deceptively tame looking, this road is not for the unprepared. I’ve traveled this road many times and I’ve seen Jeeps, Landcruisers, and Subarus driving along, happy as can be… But I’ve also seen some Hondas, a few Priuses and now a rented Hyundai Sonata driving down this road. They may have made it through safely and they were either lucky or just good experienced drivers. I can tell you that this road likes to eat people’s tires and it struck again on this trip, taking out my front drivers side tire… not just once but twice on the same trip! Yeah, these are the stock tires but the Michelin LTX AT2 tires have worked great for 12,000 miles and on two Mojave desert and one big Utah National Park tour that included lots of off-road and even driving over quite of bit of really rough lava rock on our last excursion. Just be prepared, this area can be harsh on the dumb and the unprepared…

20160220_115129

Harry Wade Exit Route

20160219 Sarasota Springs

Saratoga Springs

Our first stop is Saratoga Springs, a truly unique and surprising site found in this remote part of the Park. The sight of deep blue water and the deep green vegetation of this riparian wetland in the midst of the desert, nestled against the striking colorful Ibex Hills is just an example of the contrasts that are found in the Park. Although the area around the springs is very dry we find nice pockets of flowers in the area that whets our appetite for more!20160220_115918

20160219 Sarasota Phacelia

Blue Phacelia

20160219 Sarasota Gold

Fields of Desert Gold

20160219 Gravel Ghost

Gravel Ghost

20160220_125318

Amaragosa River

20160220_132022

After crossing the usually dry Amaragosa River, the low tire pressure gauge came on. I decided to try to make it to Badwater Road and after getting to the pavement I pulled off to evaluate the tire. Luckily I keep a CO2 bottle to refill my tires on the truck. I almost left it at home for this trip! I found the leak and started trying to plug the leak, four plugs and half a can of fix-a-flat later we had pressure and we pushed on…

20160219 Ashford Mill

Ashford Mill was our destination and this area did not disappoint with the display! Desert Sunflowers, Desert Five Spots, Blue Phacelia, Sand Verbena and Gravel Ghost were all abundant but the Desert Sunflowers stole the show. Looking in all directions you could see the bright yellow flowers dominate the landscape. It was impossible to properly capture the scene and so far I haven’t seen any pictures that do it justice. Although not as impressive as displays we’ve seen up the coast or even down in Anza-Borrego but for the sheer quantity of flowers, this was a powerful display.

20160219 Fields of Desert Gold

20160219 Desert Five Spot

20160219 Desert Sunflower

20160219 Desert Gold

After basking the glory of the flowers for awhile, we decide that since neither my sister or mom had ever been to Death Valley, we should make the drive up to see Badwater and Artists Palette. There were a lot of people in the parks, no doubt here to see the superbloom for themsleves. We were surprised to see that the wildflowers were very sparse around the Furnance Creek area and it shows that the rains that came this winter were sporadic. Furnace Creek received only about an inch and a half of rain, whereas typically we need about five inches for the wildflower seeds to germinate. Obviously further south they received more rain so it’ll be interesting to see once the bloom moves up the park how other areas will do. 20160219 Badwater Reflection

bad water… bad… too salty!

20160219 Mom and Lois

Badwater Basin

20160220_155057

Artists Palette

We made a quick stop at the two locations and it was already 4PM and we still needed to get back down the Harry Wade and back home! So I checked tire pressure one last time and we headed home, along the way we got to see the flowers in the fading evening light and the sunset over the Valley. We hit the Harry Wade with just a little sunlight left and knew we would be in the dark by the time we hit the pavement on the 127. About 20 miles out from Baker the tire pressure light went on again, this time I knew that tire was dead. I drove along carefully as long as I could and pulled over where there was a decent room and a straight portion of road so other cars could see me. I pulled out two hi-intensity chemical lights and threw them out on the roadside for a little warning and clicked on the hazards. Remember, changing a tire on the side of the road is very serious business and can be extremely dangerous. You need to watch out for traffic and never turn away from oncoming vehicles. I had a very capable helper in my wife and she’s the head flashlight holder (and I had several flashlights available, for backstory on why click here…) Anyway, long story short I get my full-size spare installed and filled with air. Cleaned up my tools, gloves, jack and tire and we are on our way again in less than an hour total. My reward? The Mad Greek, of course! So our adventure ends where it began, excpet this time I have a peanut butter milkshake in my hands when we leave. If you are ever in the area, do yourself a favor and have a milkshake… they are delicious!

20160220_193327


For the rest of my pictures from this adventure please see my Flickr account here

20151230 – Getty Adventures

Follow us on instagram @adventurenotincluded or for more photos, check out our Flickr album here.

There are a lot of people who are born and raised in Los Angeles that don’t know anything about their own city. Sure, they know to take visitors to Disneyland or to the LA Zoo but ask them about the Huntington Library, the Arboretum or the Getty and you sometimes get a blank stare. We aren’t so different I guess, I always leave town before I go to a museum or art gallery, which is strange considering the great places that we have locally. In my almost thirty years of living in LA, I had only been to the Getty Center once and had only heard about the Villa once or twice. We needed to change that so we decided to make a day of visiting the Getty Villa in Pacific Palisades, the Getty Center in Brentwood and round it all off with dinner somewhere on the Westside. If you are from the Westside then this may sound pretty pedestrian but to us hardcore East-siders this is a mini adventure!

The Getty Villa is in the Pacific Palisades neighborhood of Los Angeles although they claim Malibu as their home. It is one of two locations of the J. Paul Getty Museum. Oil tycoon, J. Paul Getty opened a art gallery adjacent to his home in Pacific Palisades. As his collection grew he added a second gallery, the Getty Villa, on the property down the hill from the original gallery. Inspired by the Villa of the Papyri at Herculaneum, the Villa incorporated additional details from several different ancient sites. It was designed by architects Robert E. Langdon, Jr. and Ernest C. Wilson, Jr. and opened in 1974. Sadly Getty would never get to visit the Villa himself but upon his death in 1976 he left the museum over $661 million dollars.

20151230 002

20151230 004

20151230 005

Our friends Spencer, Cindy and Amy and her two kids.

20151230 007

The Getty Villa is an educational center and museum dedicated to the study of the arts and cultures of ancient Greece, Rome, and Etruria. The collection has 44,000 Greek, Roman, and Etruscan antiquities dating from 6,500 BC to 400 AD. The sculptures are truly amazing in detail and it boggles the mind to think that the flowing lines and soft curves are carved from stone. I find it facinating that these sculptures have survived and still retain their beauty.

20151230 008

20151230 011

20151230 014

20151230 015

In 1997, portions of the museum’s collection of Greek, Roman and Etruscan antiquities were moved to the Getty Center for display, and the Getty Villa was closed for renovation. When the Villa reopened in 2006, the Getty Villa included a new architectural plan that included buildings that surrounded the Villa, which are designed to simulate an archaeological dig with its many layers.

20151230 017

20151230 022

20151230 026

To explore the Getty plan for at least two or three hours. The museum has so much to offer, it can seem overwhelming at first but take your time and wander around its gardens, listen to the fountains and drink in its views. Along the way enjoy an al fresco lunch in its informal, outdoor patio cafeteria. Soak in the atmosphere while strolling through the Roman herb garden and enjoy something that even J. Paul Getty himself never got to experience!


Our next stop is the Getty Center located in the Brentwood neighborhood of Los Angeles. The Center is a campus of the Getty Museum and other programs of the Getty Trust. The Center opened to the public in 1997 and is well known for its architecture, gardens, and views overlooking Los Angeles. The two locations of the J. Paul Getty Museum together draw 1.3 million visitors annually. The Center features pre-20th-century European paintings, drawings, illuminated manuscripts, sculpture, and decorative arts; and 19th- and 20th-century American, Asian, and European photographs.20151230 033

The Museum’s collection at the Center includes outdoor sculpture displayed on terraces and in gardens and the large 134,000-square-foot Central Garden designed by Robert Irwin. Irwin was quoted as saying that the Central Garden “is a sculpture in the form of a garden, which aims to be art.” We got here a little later in the day so it was hard to get photos of the flowers themselves but the late afternoon sun looked great on the buildings!

20151230 035

20151230 036

20151230 037

More than 500 varieties of plant material are used for the Central Garden which is always changing and is never the same.

20151230 039

20151230 040

20151230 044

The Getty Center was designed by architect Richard Meier and all of the buildings at the Getty Center are made from concrete and steel with either travertine or aluminum cladding. Around 1,200,000 square feet of travertine was used to build the Center and although the travertine looks great at sunset, the aluminum cladding is starkly beautiful at night…

20151230 045

20151230 048

20151230 049

So now its time to get some dinner and where do we go? There’s a lot of options on the West Side but we decide on a San Francisco favorite! The Stinking Rose! Executive Chef and San Francisco restaurateur Andrea Froncillo opened The Stinking Rose in Beverly Hills in 1995 as a follow up to his North Beach restuarant on Columbus. The theme of The Stinking Rose is encapsulated in the restaurants’ official motto, “We Season Our Garlic With Food.”and they aren’t kidding around. If you don’t like garlic then you need to stay away from this place. From the exterior, it may be hard to tell what’s going on inside. They saved all the character for inside the restaurant, to the point of sensory overload. This place is literally devoted to all things garlic… decorations, t-shirts, bumper stickers, hot sauce, cookbooks, you name it and they got it with garlic on it, in it or about it. Understated and reserved it is not.. but the kids loved it!20151230_184604

Start off with an order of bagna cauda, literaly means “hot bath” and made with roasted garlic cloves in butter, olive oil and gasp! anchovies… shh! Just ignore that last item and try it out! Smear the garlic clove onto a warm roll and you’ll be in garlicky carb heaven. I could just eat these all night… the food here is suprisingly good and kid friendly. If you must you can always order “Vampire style” and they’ll prepare your dish sans garlic, but why are you here if you don’t want any garlic?? The pasta is perfectly al dente and none of the dishes are overpoweringly garlicky. They manage to use three tons of garlic each month and so they’ve learned how to coax the sweetness and other subtle flavors from the stinking rose. They even have a garlic ice cream, that although we did not get to try any this time, I have had it in the past and I love it! It is a unique dining experience in LA and the service is always excellent. The food is as flavorful as the decor and a must try for garlic lovers everywhere… and if you don’t like garlic well… I’m sorry but you’re gonna have to put up with the rest of us!

To see more pictures from this trip click here